Categories
Baha'i Celebrations Children class Free Ruhi Book 3

BAHÁ’U’LLÁH IS THE MANIFESTATION OF GOD FOR TODAY GRADE 4 LESSON 1

Lesson 1 Grade 4 Set 1 Ruhi Book 3

Introducing The Principal Theme

Welcome to the first set of lessons for Grade 4. These lessons seek to expand our understanding that, in the incomparable figure of Bahá’u’lláh, God has revealed to humanity His greatest Name, the All-Glorious.

It is amazing to be alive at this moment in history, in this promised Day of God, when He Who is the King of Kings, the Glory of God, has been made manifest.

This first lesson is intended, above all, to uplift our hearts and to make us aware that, in every corner of the globe, the life and teachings of Bahá’u’lláh are the cause of celebration; everywhere people are raising their voices in praise of Him and joining hands to build the peaceful and united world He envisions.

To set the scene for the ensuing discussions, let us review what we have learned in the third grade.

Can you name some of the Manifestations of God that have brought the light of His knowledge to the peoples of the world down the ages?

You have already learned that the Manifestations of God are very special Beings Who come from time to time to guide humanity along the right path.  They reflect the attributes of God as a mirror reflects the light of the sun.  You have also learned that the Bab was a Manifestation of God who prepared the way for the coming of Baha’u’llah.  Baha’u’llah is the Manifestation of God for today, which means that, by knowing Him, we are able to gain knowledge of God and that, by obeying Him, we live in accordance with the Will of God.

Humanity is like a child who needs to be educated.  When a child has learned all that there is to learn in one grade, he must move on to the next.  In this new grade, he will have another teacher, as wonderful as the previous one, who will teach him what he could not have understood before.  If a child is too attached to the old teacher and decides to reject the new one, he will never progress.  In the same way, when a Manifestation of God appears on earth, it is the duty of the followers of all earlier Manifestations to accept Him and learn to live according to His teachings.  You already know that we live in a special Day, the beginning of a New Era in the long history of the human race.  Baha’u’llah is the Manifestation of God that teaches us how we are to live in this Age.  It is now the duty of the followers of every religion to investigate the claims of Baha’u’llah, recognize Him, and follow Him, as He is the new Teacher spoken about for thousands of years Whose teachings will enable us to build the promised Kingdom of God on earth- a peaceful and prosperous world civilization based on the principles He has brought to humanity.

Every one of God’s Manifestations has spoken of a time when humanity would forever lay down its weapons and learn to live in peace and happiness. For centuries, people everywhere have anxiously awaited the promised Day of God. We are fortunate to know that this new Day has dawned. God’s promise to humanity has been fulfilled by Bahá’u’lláh, and people from every race, religion, and nationality are uniting around His vision of humanity as one family. His teachings show us how to replace estrangement with loving fellowship, tyranny with justice, conflict and contention with peace and tranquility. Although we have heard many accounts related to Bahá’u’lláh in the past, now in Grade 4, we will learn the story of His life and much more about His Revelation.

But before we begin our lessons on His life, let us go back only a few years to 2017. Does anyone know what special anniversary took place that year? It was the two hundredth anniversary of the Birth of Bahá’u’lláh, and all over the world, in every land, people celebrated His life and teachings. I am going to share with you a map that shows all the countries in the world where celebrations were held, and you will see a few photographs from different events. Then I will tell you some stories about these festivities.

In this lesson, you are also going to memorize a quotation in which Bahá’u’lláh declares that the promised Day of God has come and that the sun of His bounty is shining resplendent for all to see. And we know that soon, as more and more people begin to follow His teachings and work together side by side, God’s Kingdom will be established on earth. Bahá’u’lláh is the King of Glory.

  • Why do the Manifestations of God come to humanity from time to time?
  • How can we live in accordance with the Will of God?
  • Can you mention the names of some of the Manifestations of God that came before The Bab and Baha’u’llah?
  • What should the people of the world do now that a new Manifestation of God has come to guide them?
Lesson 1 Grade 4 Set 1 Ruhi Book 3

There will be 3 prayers to memorize for lessons 1 to 4. All will be listed, but it is recommended to choose one at a time and learn over the next 4 lessons.

Memorization Aids:

Get Set 1 Here

Prayer 1

Lesson 1 Grade 4 Set 1 Ruhi Book 3

Prayer 2

Lesson 1 Grade 4 Set 1 Ruhi Book 3

Prayer 3

Lesson 1 Grade 4 Set 1 Ruhi Book 3

The promised Day of God is come! He Who is the Manifestation of the Adored One hath been established upon the throne of His name, the All-Loving, and the sun of His bounty hath cast its rays upon the seeing and seen alike.

BAHÁ’U’LLÁH

Meaning Of Words

Want to know the meaning of the words in the quote? Look them up and record them here. Keep it safe in your notebook!

SEND A POSTCARD

Send to a friend or neighbor. Use email, snail mail, or hand-deliver!

Grade 4 Lesson 1 Set 1 Ruhi Book 3
Lesson 1 Grade 4 Set 1 Ruhi Book 3

Siyah Chal

Bahá’u’lláh

Creadell Haley – Baha’u’llah

The Ancient Beauty – Titles of Bahá’u’lláh

Prince of Peace 

Who Is the Prophet

Photos of Celebration From Around The World

Vignette 1

In the rural parts of India, whenever there is a special celebration, homes are decorated with “rangoli”. Rangoli are large, colorful designs created on the floor or ground, using petals from flowers, colored rice and sand, and sometimes dry flour. Usually, the mother and daughters will rise early in the morning, clear the space for the rangoli, outline the design with chalk, and then fill it in with the petals and colored rice and sand they have prepared.

Now, in the Indian state of Chhattisgarh, there is a small village of about one thousand people, and to celebrate the two hundredth anniversary of the Birth of Bahá’u’lláh, many families decorated the ground in front of their homes with rangoli. Can you imagine how beautiful the village looked as the festivities were approaching?

In preparation for the celebration, fifty-five people fasted as a sign of their love for Bahá’u’lláh. When one fasts, one stops eating for a period of time so that, instead of thinking about the things of this world, one’s thoughts are focused on the spiritual. Then, as nightfall came, lamps were lit in front of almost all of the homes, and a group of youth went through the streets of the village, playing drums and inviting everyone to the celebration.

At 8:00 in the evening, the festivities began. Prayers were chanted, songs were sung, skits were performed, presentations were given. Youth arose and spoke of Bahá’u’lláh and His teachings. So joyful were the festivities that they continued into the early morning hours of the next day. But the celebrations were not yet over. The villagers organized a series of prayer meetings for the next two days. Some eighty homes were opened for this purpose, and around four hundred people altogether gathered in prayer during those two days, to offer their gratitude to Bahá’u’lláh and ask for His continued guidance and blessings.

Vignette 2

In one town in Turkey, the friends spent weeks preparing to celebrate the two hundredth anniversary of the Birth of Bahá’u’lláh. They rented a theatre hall for the occasion, sent out invitations, and prepared a program that included a presentation on His life and teachings. There were even posters about the event. Now, a week before the celebration, one of the organizers received a telephone call. It was a woman who had gone to the theatre hall for the gathering only to find out no one was there. She had learned about the Blessed Beauty, Bahá’u’lláh, she said, five years earlier. Every day since, she explained, she remembered Him in her prayers. She was so excited to be able to participate in the celebration of His Birth that she had mixed up the dates and had come to the event one week early!

Vignette 3

In Tanzania, more than 13,000 people participated in festivities, held in some ninety places all around the country, to celebrate the Birth of Bahá’u’lláh. Try to imagine what kind of preparations were needed. Work had to begin weeks and weeks in advance, and of course, at every step, the friends received divine confirmation. Here are accounts from two communities.

A few families from a village near Lake Victoria realized that the community would need more money in order to carry out its plans. It had organized two days of activities and expected many guests from other villages, who would need to be fed and offered a place to stay. The community also wanted to rent a screen on which to show a most beautiful film about Bahá’u’lláh called “Light to the World”. So what did these families do? They decided that, since they lived near a lake, they would raise ducks and then sell them when the market was good. Thankfully, the number of ducks multiplied, and a month before the celebrations they were sold. Together with other contributions received, the community had all the funds it needed to take care of its many guests. 

Vignette 4

In the capital city of Dominica, a beautiful island in the Caribbean, a group of youth painted lovely murals on the outside walls of the Bahá’í Center as a gift for the bicentenary celebrations. The community rallied around the project, with many people donating supplies such as paint. The building had not been repaired for several years, and since the youth began by scraping off the old paint, they decided they would also strengthen the foundation of some of the walls with stones collected from the ocean. And that was most fortunate, for, a few weeks before the celebrations were to begin, a strong hurricane tore through the island, and many people sought shelter in the Center. When the storm was over, they saw that the Center was one of the few buildings left standing, and it became a place of refuge for those who were homeless and a hub of activity as work began to rebuild the island.

Vignette 5

On the occasion of the bicentenary of the Birth of Bahá’u’lláh, the Universal House of Justice wrote a most beautiful message addressed to all those who celebrate the Glory of God. You know, of course, that Glory of God refers to Bahá’u’lláh. In the message, the House of Justice states clearly that Bahá’u’lláh is God’s Manifestation for today and that He has given us the teachings we need to bring about peace and live in unity. It invites people everywhere to participate in building a better world.

Now, in many places, the message was read and studied when people gathered to celebrate Bahá’u’lláh’s Birth. One such meeting took place in a town in Uganda. A large hall was selected for this purpose, and many local leaders, including religious leaders, attended. There was much chatting among the participants, and the hall was filled with noise, until the message started to be read aloud. Then everyone fell silent, as they listened to the words of the House of Justice. The message captured their attention completely. At the end, some of the local leaders asked the Bahá’í friends to give them copies so that they could study the message again later themselves. Even one of the religious leaders decided that the members of his church should read it. “It is the duty of all people to respond to the call of Bahá’u’lláh,” said one leader who, before the bicentenary events, knew very little about the Bahá’í Faith.

Vignette 6

Jamundí is a town located in the southwestern region of Colombia. Some thirteen gatherings, attended by more than 1,600 people, were held throughout the town to celebrate the bicentenary of the Birth of Bahá’u’lláh. One of these was carried out by students and teachers at the Simmons Bahá’í School, which, for many years, has offered primary and secondary education, as well as a kindergarten program, to young people in the town.

Now, just before families and friends were set to arrive, a dark cloud formed in the sky and a strong storm moved in, flooding the streets. With great concern, the children and teachers waited for their guests, but the rain was not stopping. Suddenly, a stream of people started arriving, all in wet clothes. The venue was filled to capacity, and the program began.

Lights lit up the room, and children intoned prayers and quotations by heart. The sweetness with which they raised their voices to recite the words of the Blessed Beauty touched the hearts of those present. But the most special moment was yet to arrive. The narration of the story of the life of Bahá’u’lláh was under the care of a group of children in fifth grade. Little by little, and with astonishing confidence, each child took a step forward and narrated a small fragment of the life of this Divine Educator. “Bahá’u’lláh, the Manifestation of God for this Age, was born in Ṭihrán, in a faraway country called Iran,” noted the first. With a firm step, a little girl moved towards the microphone to add, “Ever since He was young, Bahá’u’lláh displayed extraordinary signs and qualities for a child His age.” The next one made reference to the dream that Bahá’u’lláh’s father had, in which his Son appeared to be swimming in a great ocean and from each string of His hair a fish was attached. “The multitude of fish followed Him without being able to hurt him,” concluded the boy. The most moving moment was when the smallest child spoke about the sufferings of Bahá’u’lláh. He stood in front of the microphone and kept quiet for a moment. “I don’t know why they hurt Him so much when He was such a good person,” said the little boy with a quivering voice, which made it difficult for him to continue. At that moment, his teacher stepped towards him and embraced him tenderly. “They placed such a heavy chain around His neck” was all the child could add. Tears flowed down the faces of some of the guests. The dignified manner and the emotion with which the children recounted the story of the Blessed Beauty moved deeply the hearts of the more than seven hundred people who attended the event.

The presentation was followed by a burst of jubilation when the children danced in colorful costumes and hats to rhythms representative of Colombia: bambuco, currulao, torbellino, and cumbia. At the end of the event, the parents expressed how happy they were to have found out more about the life of Bahá’u’lláh and the teachings He brought to the world. 

Vignette 7

Santiago is the capital of Chile, and over five million people live in that city. It is surrounded by majestic mountains and, at the foot of one of them, just above the city, a beautiful Bahá’í House of Worship has been built. It took many years to finish the work. Perhaps you have seen a picture of it. Thankfully, it was completed about a year before the bicentenary of the Birth of Bahá’u’lláh, in time for the celebrations. There was a gathering in the Temple itself, and a choir sang so beautifully that their voices lifted up to the heavens the souls of everyone present. Outside, on the Temple grounds, there was an exhibition on the life of Bahá’u’lláh, and streams of visitors came to see it. The mayor of the city even came to accept a gift of 2,000 trees from the Bahá’í community, as part of a project to help keep the environment healthy. It was a most joyous time.

Vignette 8

In the capital city of Azerbaijan, the government gave consent for the Bahá’ís to hold their bicentenary celebrations in the most important cultural center in the country! What is more, the government employees who worked for the center helped the Bahá’ís with all aspects of the program. An orchestra played music, while a slide presentation with pictures of Bahá’í Holy Places was given. A film about Bahá’u’lláh, “Light to the World”, was watched by more than three hundred and fifty people in complete silence. No one even got up from their seats once. Journalists, writers, lawyers, professors—people from all walks of life were there. But it was the participation of one of the state ministers that was most encouraging. Again and again he urged the Bahá’ís to work harder to spread Bahá’u’lláh’s teachings. He was greatly impressed to see that there were Tablets revealed by ‘Abdu’l-Bahá about the country, and he suggested that they be widely circulated so that the entire population could learn about the Faith. “You are involved in very profound and far-reaching processes,” he told the Bahá’ís. “It is not an easy task and will take quite a long time, but there is no other way. Sooner or later humanity will turn to Bahá’u’lláh’s teachings.”

And, the same thing happened in a large city in another part of the country. The program, too, was held at an important government facility with the help of its workers. Around two hundred people attended, and an official from the government opened the program with a short and passionate speech. In a booming voice, he invited the entire hall to celebrate “the coming of the new Prophet of God for this Age!”

Vignette 9

Many of the celebrations for the two hundredth anniversary of the Birth of Bahá’u’lláh were held in theatres and large halls. Most, however, took place in small neighborhoods in cities across the globe. Can you imagine how many celebrations people had in their homes and in local meeting places? It would be impossible to count them all. But let us listen to the story of two.

East Timor is an island nation, north of Australia. There, about thirty youth decided to host a program in their neighborhood. They made almost all the preparations themselves, and as the day approached, they slept very little, so busy were they in finalizing their plans. To their great joy, more than one hundred people from the neighborhood came to the program. The youth performed dances and skits and gave short talks. They spoke very clearly about who Bahá’u’lláh is and what they had learned about His teachings from Bahá’í institute courses. With tears in their eyes, they humbly thanked their tutors with small gifts for helping to change their lives. All the guests were happy that day, and the youth were greatly encouraged by the success of the event. They had indeed showed courage in talking so openly and directly about Bahá’u’lláh and His Mission.

On the other side of the world, there is another large island, called Prince Edward Island, which is part of Canada. A Bahá’í, new to a neighborhood in the capital city, wondered what to do as part of the festivities for Bahá’u’lláh’s Birth. The idea came to host a simple dinner, to which some of the neighbors would be invited to bring a little food and learn about Bahá’u’lláh. So, colorful invitations were made that read: “Celebrating the Vision of Bahá’u’lláh: Unity of all races, religions and cultures”. After delivering the invitations door to door, the new neighbor waited to see how many people would come. The apartment was not very big, but a large crowd was not expected. When the time arrived, however, a stream of people flooded into the apartment. There was hardly any space to move! After sharing food together, they had a lively discussion about unity and read quotations from the Writings of Bahá’u’lláh about the oneness of humanity. Everyone agreed that they should have more discussions of this kind.

Vignette 10

The BriBri are a people in Central America. A large number of the BriBri people reside in a mountainous region called Talamanca, which is part of Costa Rica today. When the Bahá’í community of Talamanca thought about how many people might come to the bicentenary celebrations, the friends realized that their local center would be too small. They decided to build a new structure which could hold all of their expected guests. And so work began. Men, women, young and old—everyone helped. They bought enough wood to make a long structure with a high ceiling and a metal roof. The space could hold up to five hundred seats, and at one end, they built a stage.

Now, have you ever seen pictures of the beautiful gardens around the buildings at the Bahá’í World Centre? Well, the friends in Talamanca beautified their new building with similar gardens, and there were nine-pointed stars made of plants and colorful flowers on the grounds around the building and paths lined with white stones. As the long-awaited day approached, work intensified and excitement mounted. Food was prepared, and transportation arranged for some of the participants. And guess how many people came, from all over the region: 514! The building was filled to capacity!

For two days, they celebrated. There was music, singing, drama, and dance. When the time came on the second day to watch the film about Bahá’u’lláh, “Light to the World”, hearts were so transformed that no one could hold back their tears of joy and gratitude. And, at the end, everyone rose—even the older folks—as the two-day celebration came to a close with dancing to the song, “La Fiesta del Pueblo”.

Mirror

  • The children work in pairs to mirror each other’s actions.
  • Select one person to be the mirror for the first round and then swap after a few minutes.
  • After both children have had a turn, change partners.
  • Lay down some ground rules, so that the mirror doesn’t feel obliged to do something they are not comfortable with (e.g. no fingers up noses).
  • You could set the scene, e.g. they are doing their morning routine, hosting a holy day, doing their exercises or practicing a dance.

Make a Rangoli (Based on vignette 1)

Rangoli are large, colorful designs created on the floor or ground, using petals from flowers, colored rice and sand, and sometimes dry flour. Usually, the mother and daughters will rise early in the morning, clear the space for the rangoli, outline the design with chalk, and then fill it in with the petals and colored rice and sand they have prepared. Make your own on the floor or use a large piece of cardboard to create.

Plan an event for your community! (Based on vignettes 2, 8, 9, and 10)

Use the workbook below and follow the simple steps by answering the questions. Remember to invite me!

Download the planning workbook

Grade 4 Lesson 1 Ruhi Book 3 Set 1

The Light To The World (Based on Vignettes 3, 8, and 10 )

Watch the film ” The light to the world” and then record your thoughts. This could be on what your actions might be, on how you felt, etc.

Draw A Mural (Based on Vignette 4)

Draw a mural with your class on a wall if possible or in class on a long strip of Kraft paper.

Message from the Universal House of Justice (Based on Vignette 5)

Have you read or listened to any letters from The Universal House of Justice (UHJ)? These letters offer powerful insights into the current state of humanity as well as guidance. You can read it here . Share any part of the letter and what you understand from it in a format of your choice: a drawing, a newspaper article, a poem.

Retell the story of Bahá’u’lláh (Based on Vignette 6)

Plan to re-tell a small fragment of the life of Bahá’u’lláh at a feast or holy day. This can be each child saying one of the points, or drawing an image of each point without having an image of Bahá’u’lláh.

  1. “Bahá’u’lláh, the Manifestation of God for this Age, was born in Ṭihrán, in a faraway country called Iran,”
  2. “Ever since He was young, Bahá’u’lláh displayed extraordinary signs and qualities for a child His age.”
  3. “The multitude of fish followed Him without being able to hurt him,”
  4. “I don’t know why they hurt Him so much when He was such a good person,”
  5. “They placed such a heavy chain around His neck” was all the child could add. 

Design a house of worship (Based on Vignette 7)

The Bahá’í House of Worship was finished just in time for the bicentenary of the Birth of Bahá’u’lláh. If you had to design a House of Worship what would that look like?

Note that All Bahá’í Houses of Worship are required to have a nine-sided shape (nonagon) and to have nine pathways that lead outward and nine gardens surrounding them.

Other

Dayspring magazine has lots of activities: Download here

Grade 4 Lesson 1 Rughi Book 3 Review Quotes

The time foreordained unto the peoples and kindreds of the earth is now come. The promises of  God, as recorded in the holy Scriptures, have all been fulfilled. 

Gleanings From the Writings of Bahá’u’lláh

Memorize the quote

Click on the photo to download
Categories
Cards Celebrations Free Greeting Cards Paper

INTERACTIVE WORKING GUMBALL MACHINE CARD FREE

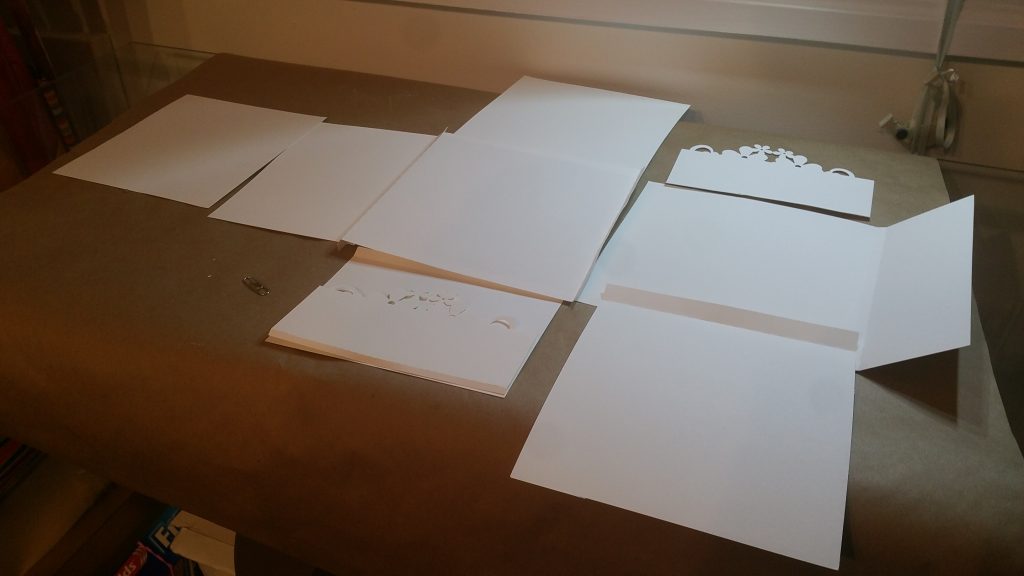
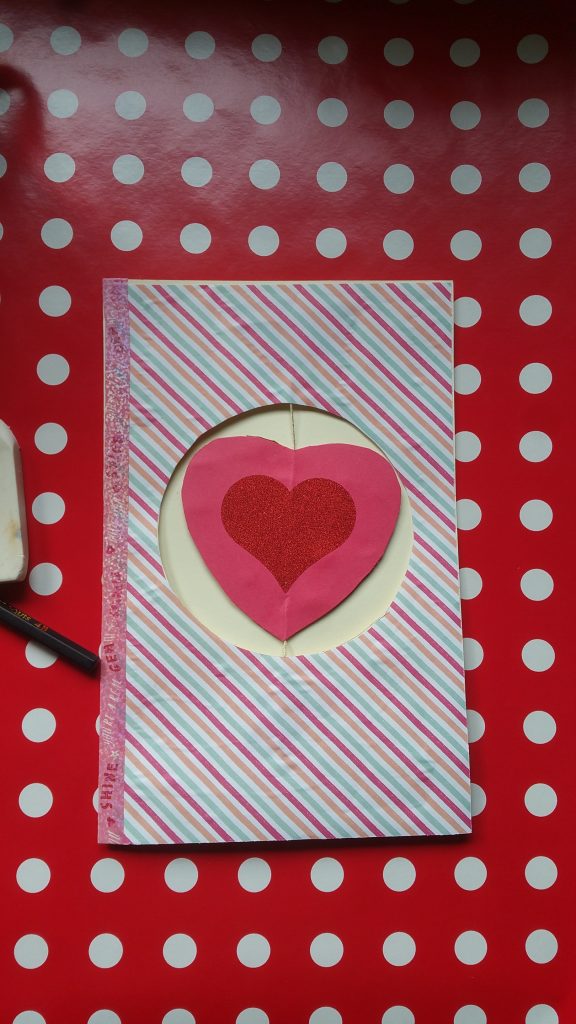
I was looking for an interactive card to make as I LOVE paper creations that move when I came across a few people making a gumball machine that dispenses candy. YEP, it really worked. So I wanted to make my own card and tried out one of the videos with so-so success. After looking at a few different ways to put this card together, I decided to do my own, so below is what I did and some tips on what worked. I will give instructions for both solid cardstock and the cardstock/foam tape version.

Give some credit!

So before I begin with my own design, I would like to list the places I saw this card.

Material

Here is a list of what you will need to make this card

  • Heavy cardstock 110 pound
  • Decorative Cardstock for gumball machine.
  • Double sided foam tape
  • Double sided sticky tape
  • Glue
  • Acetate for shaker window
  • Candy: mini M&M or Tic Tac
  • Optional chipboard 1/8 inch thick
  • My SVF file or your Circle Dies- 2 in, 1 in, 1/2 inch

Easier Than You Think

Ok, I am going to give quite a bit of detail below and although I hope to be clear in the instruction, you may look at it and think it’s complicated. It’s NOT! The general assembly once everything is cut takes about 15 minutes.

The piece we will use are named for easy reference

Pieces

  1. Gumball Card Base
  2. Guide Mechinism which looks like a rectange and a odd lightbulb shape cut out
  3. Dispensing Mechinism looks like a circle with a wedge shape cut out – PacMan shaped for those of you old enough to remember!
  4. Handle made up of small circles and rectangles
  5. Optional 1/4 inch strips to cut for a tidy finish.
  6. Lid to cover the refilling candy space.
  7. Gumball Machine Body
  8. Greeting Card base
  9. Stopper

Assembly

Gumball Card Base – Cut 1

Working Gumball Machine
Gumball Card Base- the starting point to dispensing candy from a working gumball machine

CUT 1 of the Gumball Card Base

Cut a piece of acetate 4 inches long by 3 inches wide and using double-sided tape/glue, cover the larger (shaker) window.

Glue the acetate to the back of the Gumball Card Base – choose any side to be the back. Glue or double-sided tape can be used and will not show when the card is finished.

Additional information: The size for the Gumball Card Base was taken from the Tiffany Yu version. The size of the Gumball Card Base used in this file is 4 inches by 5.25 inches. I found this Gumball Card Base size to be perfect. I did try using 65-pound cardstock in my trial version but decided on the heavier 110-pound cardstock. All of the various parts are made using 110-pound cardstock with an option to use less cardstock by using a combination of Cardstock, foam tape, and use 1/8 inch chipboard for the inner part of this card. You will need a Cricut Maker to cut the chipboard if you decide to use this material. The size of the circles on this card base is 2 inches, 0.55 inches and 1 inch cut partially for the tray. When I made the file, The position of the window (2 inches) and The mechanism/handle turned out to be crucial in a smooth dispensing of candy.

The various parts of the Gumball Card Base
Card Base GumBall
This is the Gumball Card Base that is used as a base to creates the gumball machine

Inner Mechinism

The inner part of this interactive card has two parts, First is the Guide Mechanism for the candy to move from the window to the Dispensing Mechanism that catches the candy and dispenses it.

Guide Mechanism

Cut 1, 8, or 12 of these depending on what you decide after reading the additional material below.

Foam tape can be used in between the cutout pieces in any fashion you like to bring the inner mechanism to the required 1/4 inch.

Glue the assembled Guide Mechanism to the back of the Gumball Card Base

Option 1: Use 12 pieces of Inner Mechanism cut from 110-pound cardstock. My image below the inner mechanism is not yet glued together. This version does not need anything extra to protect against a sticky edge.

12 layers of cardstock. no edges to cover as none are sticky

Additional information: We need to create a space between the shaker window and the back of the card that will allow the candy to flow smoothly. If the candy is flat, the mini M&M is about 1/4 inch. If it ends up sideways then it needs 1/2 inch.

I used 1/4 inch spacing, and if any went sideways, a little shake fixed the issue. To get this space, I stacked and glued 8 of the inner mechanism and then used 2 layers of foam tape.

You can also get a 1/4 inch space by using all foam tape: Cut one of the inner mechanisms to use as a guide and then put foam tape on all of the solid areas. Don’t go too close to the cutout section in the middle of the Guide Mechanism as you don’t want the candy sticking to the foam. If you decide to use only foam tape, you will have to use a 1/4 strip of paper to cover the sticky edge later on in the assembly or dust the sticky edge with powder to get rid of the stickiness. A 1/4 inch strip to cut is included in the file.

You can also use only cardstock, cut 12 pieces, and glue them together. This will make your card a little heavy, so if you are thinking of mailing it your postage may increase

Option 2: Use 1 piece of Inner Mechanism cut from 110-pound cardstock. Use foam tape to build the space to be 1/4 inch. We will need to use a 1/4 inch strip of paper to cover the inner edge of the inner mechanism so that the candy does not get stuck. with any foam tape use, this strip of paper to cover the sticky edge is needed.

Dispensing Mechanism:

Cut 1,8 or 12 of the Dispensing Mechanism after reading additional information below

Cardstock foam tape: use 1 Dispensing Mechanism cut from cardstock and layer foam to create a 1/4 high object. This is best done as described by Tiffany Yu. Cut 4 1 inch circles and cut in half. Layer on the bottom of Dispensing Mechanism. Cut 2 half circles 1 inch in diameter and fold each piece in half. Layer on the solid wedge area.

Cardstock only: For the Dispensing Mechanism, you can also use only cardstock: cut 10 to 12 of the Dispensing Mechanisms and glue them together to form a 1/4 inch thick object. Cover each side with a solid 1-inch circle.

Insert the assembled Dispensing Mechanism to the back of the Gumball Card Base so that it looks like this below. note that yours will have the additional solid circle covering this Dispensing Mechanism so the wedge will not actually be visible.

Final Assembly of The Card

Gumball Machine

Cut 1 of each

The Gumball machine consists of a gumball base and a circle. These are glued to the front of the card Base

Handle

Cut 8 of the .5 inch circles and 8 of the 1-inch rectangles cut and 1 out of decorative paper

The handle has 2 parts: first is the 8 small circles about .5 inches in diameter that are glued and stacked and then finished off with the rectangular part of the handle made up of 8 pieces of cardstock. Put this through the .55 inch hole in the front and glue it to the Dispensing Mechanism that is at the back

Stopper

The removeable stopper to refill the gumballis simply two pieces of cardstock with foam tape and some string snadwitched between them. The finished thickness should be 1/4 inch.

Greeting Card Base

Greeting Card Base 8.5 by 5.5 folded in half. The entire assembled Dispensing Gumball Machine is adhered to the front of this card. You can stamp a message in the shaker window area so that when the candy is finished, there is a message.

Well, All Done

Once you attach the finished gumball machine, adhear to the front of your greeting card and fill with candy. The stopper prevents the candy from falling out and can be removed to refill.

If you would like the svg file, drop me a note and I will email it to you. The file below is PDF.

For SVG File

Here is a link to my google drive for the SVG file: SVG FILE

Categories
Celebrations Creating files Free Greeting Cards Mini Album and Brag Books Paper scrapbook silhouette design store Template

Grab the Free Folio Now

Folios are multi use pages that I love! and free files are dear to my heart so put them together: Free Folio can’t be beat! See my Halloween Folio. These folio pages can be used as mini albums, an interactive greeting card with photos, or as I am using them here in the wedding brag book.

To grab your free folio, subscribe below and tell me you want free folio page 4 side 1 or side 2. These will be generic and you can customized them yourself.

[wpforms id=”1223″ title=”false” description=”false”]

For page four I am using two different folio pages one for each side.

Although these folios are the same as my Halloween layout, they will look different as I customize the flaps and envelopes and also may rearrange the order the pages and flap attach to each other.

Free Folio Page 1

Both free Folios files available for page four have lots of flaps and pages and close like a book. When opened all the way the folio is an impressive 30 inches long!

Since nothing is stuck down, I may still rearrange the flaps and pages to be slightly different from the Halloween Folio. I will only know for sure when I start gluing it all down.

Customize Your Folio

I may add more pockets and tags but in the mean time, the customization done so far is :

  1. With the flap, I use a file from silhouette design store: snapdragon snippets is one of my favourite designers and I used one of her flourishes for the flap.
  2. On the pocket, I use a wedding cake I found on Google for free.The weld technique can be seen here

Free Folio side 2

Like Folio 1, Side two is about 30 inched opened up. Due to the bulk, I may move this page anywhere and swap the layouts with one of the first 3 pages to prevent the brag book becoming too bulky and hence unable to close.

Although this page for side 2 is the same size when opened up, there is slightly more space for photos due to the longer flap. If you wanted even more space,,you could make all the flaps long

Photos of Folio side 2

Again, this folio opened all the way out is huge and has a lot of space for photos and journaling.

More Customization for free folio possible

Seems hard to belief that you can add more to this layout but you will be surprised! In the Halloween layout, I used a slotted inset for tags and in this one I may use a file I have been working on that is super interactive! Pulling tabs that make stuff move gets my blood moving!

Keep following me and subscribe for your chance to get any of my files I make and post.

[wpforms id=”1223″ title=”false” description=”false”]

I am also going to sell the entire package soon if that is what you are looking for. Note that you can make your entire brag book with just one layout! does not have to be so many different pages like mine.

Keep crafting and I look forward to finishing pages 5 and 6 so that we can get to the really fun stuff of decorating it all.

Here is a quick look at some of my past pages that you can request the file for free when you subscribe.

  1. Page 1
  2. Page 2
  3. Page 3

Regards

Carolyn

Categories
10 minute craft Celebrations Free Kids Can Do Paper Template

Feast Of Mercy/Rahmat

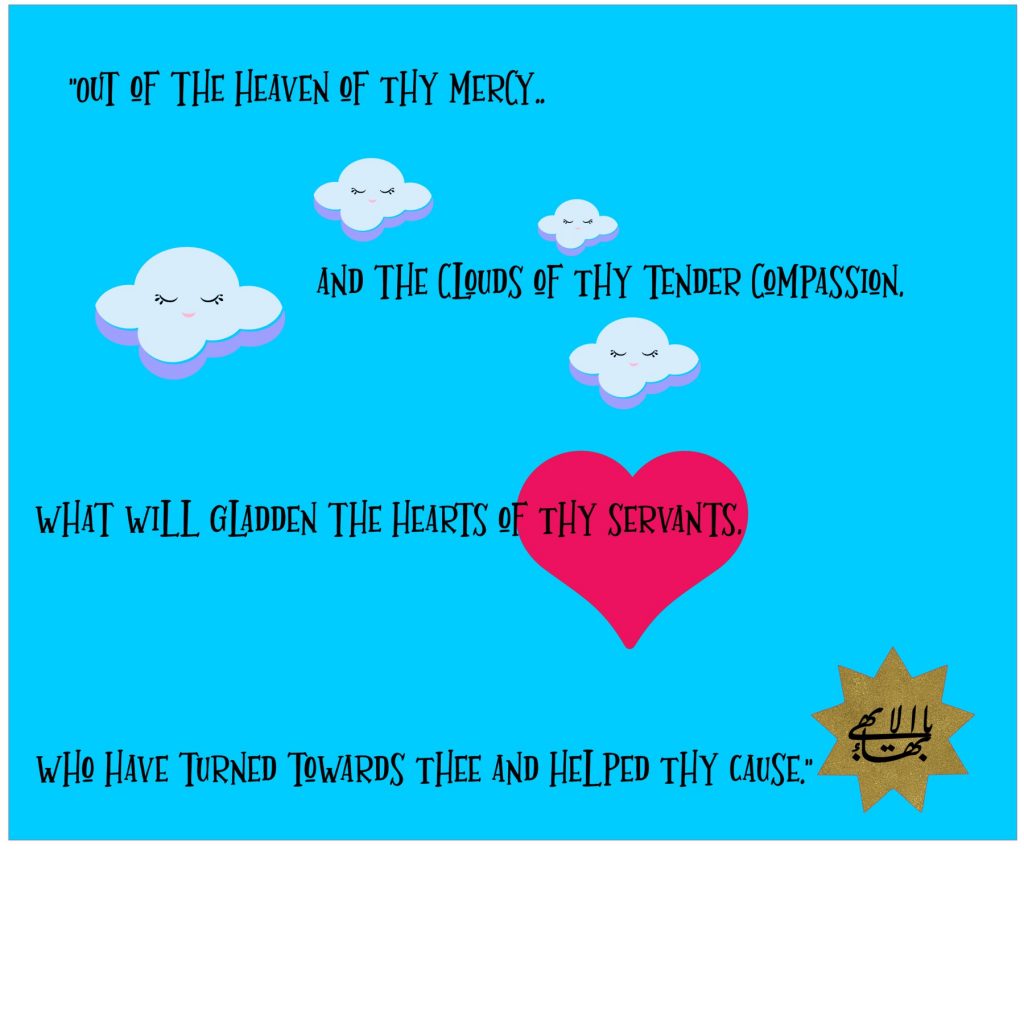
“Out of the heaven of Thy mercy and the clouds of Thy tender compassion, what will gladden the hearts of Thy servants, who have turned towards Thee and helped Thy Cause.”

Welcome to the resource for the Feast of Mercy. This Feast month we have a simple exert from the writings and a simple craft that can be done by any child.

This is the coloured version that can be used on a card or to frame:

This is a quote for the Feast Of Mercy and some images to help children remember.

For the children, this is a very simple activity that takes 5 to 15 minutes.This craft uses cotton balls for the clouds, Sparkles if you want to add to the sky or cloud or the Greatest Name, and the template picture to colour in.  

Time: 5 minutes

What you need

  • Template to download (see below)
  • Cotton wool 
  • glue
  • crayons, markers or paint
  • glitter

Method

  1. . Colour in parts or the entire picture with crayons, markers or paint
  2. Glue cotton ob for clouds.
  3. Apply glue to areas you want sparkles and apply sparkles.
  4. Shake off extra.
  5. ENJOY

Here is mine example…took 5 minutes. I used only paint and sparkles.

Feast of Mercy/Rahmat
Quote and picture painted and decorated
Categories
Cards Celebrations Events Greeting Cards Kids Can Do Paper Pop Up Cards Service project Template

POP UP CARD: CAT

My popup card was made by the children when they went to deliver gifts of old blankets to the animal shelter.

This is an easy card to put together: if you are not using a cutting machine like Silhouette Cameo or Cricut, it will take a little bit longer to cut the pieces… but not a HUGE amount of time, as the pieces are big.

Here is what you need if you are going to make the card

  • 2 colour Card stock for the card
  • Scrap pink cardstock
  • Scrap red cardstock
  • 1 colour for cat head, and body
  • 1 colour cardstock for tag
  • pen
  • glue.

Cut out the pieces

  • Download the link to my template below and print out. You can use as is and cut the images out out use the image to cut your own colour choices.
  • the two card bases are cut from 2 different colours. I used pink on the outside and grey on the inside
  • Cut the body and head of the cat out of one colour cardstock
  • Cut the nose out of pink cardstock and Tongue out of red cardstock
  • cut the tag pieces out.
cat body and head, nose and mouth as well as the first inside card base

Glue it all

  • Use the smaller card base and glue the back of the cat with tail onto the top of the card, glue the paws down to the bottom of the card.( right close to the centre line where the card folds. Glue the middle of the cat on to the cat a little way down from the tail.
  • Next add the nose and mouth to the head of the cat.
  • glue to the head to the front of the cat .
  • Glue all to the body of the cat.
  • next write your message on the blank tag provided or print the tag with the quote of kindness to animals.
  • I used dimensional foam tape to attache two tags and then glued to front of card.
  • Glue the inner card with cat inside the larger outer card

Hope you card turns out fabulous!

Here is the link to the template to cut and use your own colours or print with my colours.

Categories
10 minute craft Cards Celebrations Free Greeting Cards Kids Can Do Paper Pop Up Cards Template

Pop up Tulip Card for Mum

Tulips can be use for a Mothers Day card or Spring or get well card: It’s a pretty generic image.

The pop up card we will make today is from my Pinterest board that I saved as it looked so easy to do.

And, it is very easy! My template took less that 10 minutes to cut: that included changing paper colour and reloading the mat. It took me about 5 minutes to glue everything together.

If you have a Silhouette or a Cricut machine, you can use my free template to cut everything you need for this card (SVG, STUDIO 3 Files included) . There is also little tag to cut out and put on the front of the card if you like.

Don’t own a Silhouette or Cricut Machine? No worries, I have included my pdf version for you to print.

Steps to make the Pop up card

  • First of all cut all the pieces needed: the inner card base that has the cut in the middle, the outer card to use as a cover and the flower and leaves parts.
  • Next you need to fold 2 of the flowers in half and glue them on to the third flower at a slight angle. the top of the flower looks like a “W”
  • now glue the flower onto the pop up strip
  • attach the leaves
  • Line up the edges of the inner card with the outer card and apply glue.
  • Write your sentiment or print the one I have included.

Download the template here

Categories
10 minute craft Cards Celebrations Free Greeting Cards Kids Can Do Template

Pinterest tries: Mothers day card #2

I love to Pin stuff on Pinterest and I have many boards dedicated to paper crafts, templates, cards, journal ideas, mini scrapbooks, brag books and more.

Some of the pins are my own and lots of them are just suff I find that I love but never seem to do more with these pin than file them away.

How about you? Do you do the same? One of the things I am looking for is easy crafts for kids and families. The one below seems to be very easy so here goes!

The craft I am going to attempt is a simple craft from Pinterest that is a flower shaped Mothers day craft and I will include my template version.

By the Way, if you need another Mothers day Card then get my twirling heart Mothers Day card template here.

The list of items you will need are:

  • 2 flower shape cut out of card stock, one white and one painted or cut from coloured cardstock
  • popsicle stick painted green
  • small photo that fits in a 2.5 inch circle
  • glue
  • small clothes pin/peg
  • pen to write message
  • Use my FREE template available in SVG, PDF,Studio 3

Assemble the card using my template:

  • If using my template, cut out the pieces by hand (PDF). OR if use your machine cut out pieces using the files included (STUDIO 3 or SVG files included)
  • Put the white flower with the writing on the bottom
  • Glue the pink flower to the centre of the white flower
  • Glue the photo to the centre of the pink flower
  • Glue the flowers to Popsicle stick
  • Add little clothes pin to look like a leaf. You can clip a Mothers Day greeting to the stem.

Assemble the flower without using my template:

I get it, you love to do it from scratch yourself.

  • Cut out two flowers the same size
  • cut out a small circle for the centre of the flower
  • cut out a photo to fit the small circle or write a message in this circle.
  • Attach a photo to small circle
  • paint the popsicle stick
  • Paint one flower any colour you like
  • On the white flower write your messages
  • Glue the painted flower on top of the white flower
  • Glue the circle with the photo on top of the painted flower
  • Glue both flowers to the painted popsicle stick
  • Add a small clothes pin.

Finishing Up:

to finish up I am adding a heart to the centre of the flower and not a photo as I did not have a photo small enough. Here is what I did:

If you want to use my Template, you can download it HERE.

I hope you enjoyed this craft. think its pretty easy as I took me 5 minutes to cut and 2 minutes to assemble .

Categories
10 minute craft Cards Celebrations Free Kids Can Do Template

Easy Craft for Kids: Mothers Day Card

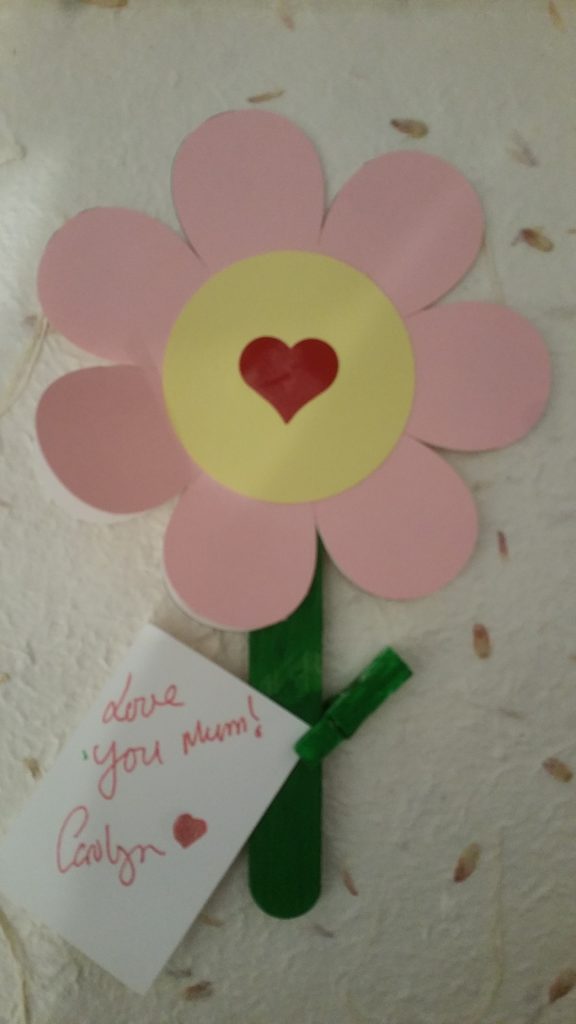
Mothers day is fast approaching and I know some of you amazing dads want to help the kids make a gorgeous card for mum. Or Maybe you are just amazing parents and want to make a card with the kids for a grandparent. I am going to use Pinterest as my best friend and resources and try a few of the cards that I have pinned on my board Easy Crafts For Kids. I will also try to keep track of how long it takes!

The first craft I am going to try is a twirling heart and can be used not just for Mothers Day but also for Valentines day, or any occasion/ lesson for heart theme . The cards original video can be seen via the link twirling heart.

Material Needed

  • You will need a piece of cardstock 8.5 x 11 inches any colour. You can use any size but my instructions and template attached will be for these sizes.
  • piece of pattern paper 8.5 x 5.5 inches
  • 2 Red hearts same size
  • A piece of string approximately 8 inches long
  • something round to draw circle.
  • tape
  • glue
  • scissors
  • pen to write your message

Steps

Fold 8.5 x 11 inch cardstock to be a 8.5 x 5.5 inch card. You can orient the card to be any direction you like (landscape or portrait)

8.5 x 11 inch cardstock folded in hald

Use something round like a lid of a jar or a drinking glass to draw a circle on the front of the card. I used a mug that was about 3.5 inches in diameter

Glue heart on to string, centring the heart on the string as much as possible so that there is an even amount on top and bottom of heart.

Place the second heart on top of the first heart so that string is sandwiched between the two hearts.

Place heart on the front of the card, centred as close as possible over the cut out circle.

Tape the string on top and below circle

Glue the patterned paper on the front of the card so that the string is hidden

Twirl the heart and close the card.

Give the card to your Mum

When the card is opened, the heart will spin. Twirl the heart and close the card and when opened again, it will spin…. continue as much as you like.

From Start to Finish

With my PDF template to print, cut out and glue it took 15 minutes. Without my template it took longer as I had to draw the circle, and hearts and then cut out : this took about 20 to 25 minutes. Using my silhouette to cut took under 10 min.

My free template of this card can be downloaded as an SVG file, A studio 3 file or PDF here.

Carolyn

Categories
10 minute craft Baha'i Holy Day Ideas Celebrations Events Greeting Cards Kids Can Do Ridvan Template

A 10 minute Craft for Ridván

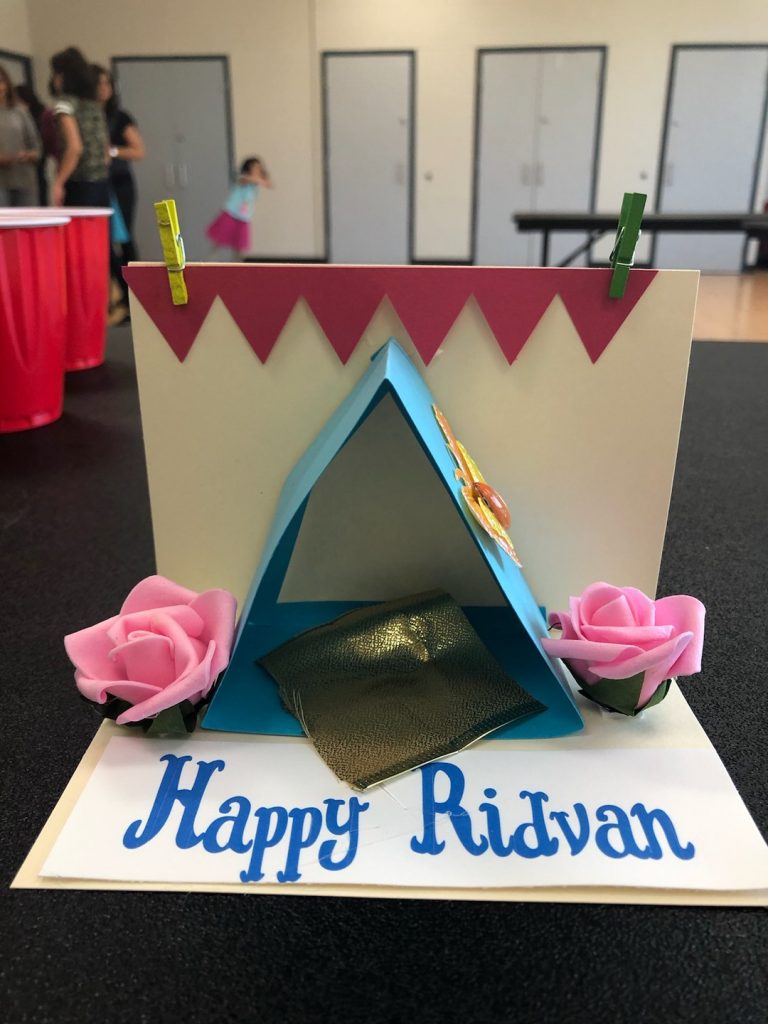
This is simple craft that you can print for Ridván for kids of all ages to do. This particular craft was put together at the Burlington children class.

The Parts

This is a small display of the Garden Of Ridván that consists of:

  1. The tent of Baha’u’llah
  2. A banner
  3. a “Happy Ridván” tag
  4. flowers
  5. Some embellishments of your choice.

What you Need

The supplies are very simple, for each display you will need:

  1. Cut 8.5 x 11 in half cardstock width wise. That means you will have a card that is 8.5 x 5.5. this is your Base. Use my template to print and cut.
  2. Cut a strip of paper 11″ x 2.5″ This is your tent
  3. cut a piece of with ribbon or material fo the “carpet”
  4. Print and cut the Banner
  5. Print out the “Happy Ridván” tag or write your own
  6. Print the pattern for the roses or buy from dollar store.
  7. Embellish with stickers , images from magazines or print and cut images you like such as butterflies, flowers, birds etc.

Assemble

The Assembly is very easy.

  1. First take your base that was cut 8.5 x 11 and fold in half so your card is 4.25 x 5.5. open it so that it is 90 degrees, you have a base and a back.
  2. Take the strip of paper that is for the tent and fold in half so you now have 5.5 x 2.5. Next on each end bend the edges back by 1″ to create a tab. Glue the 1″ tabs on to the base of the card to form a upside down “V” that will be the “tent”
  3. Put the mat inside the tent.
  4. stick “Happy Ridván” on base of card
  5. Glue flowers around the tent
  6. Glue the banner to the back of the card or use small clips to hold in place
  7. All any other embellishments you like such as birds, butterflies etc.

Template

Downloads the template in PDF, SVG and PNG here.

Categories
10 minute craft Cards Celebrations Free Greeting Cards Paper Template

Shadow box card in 10 min

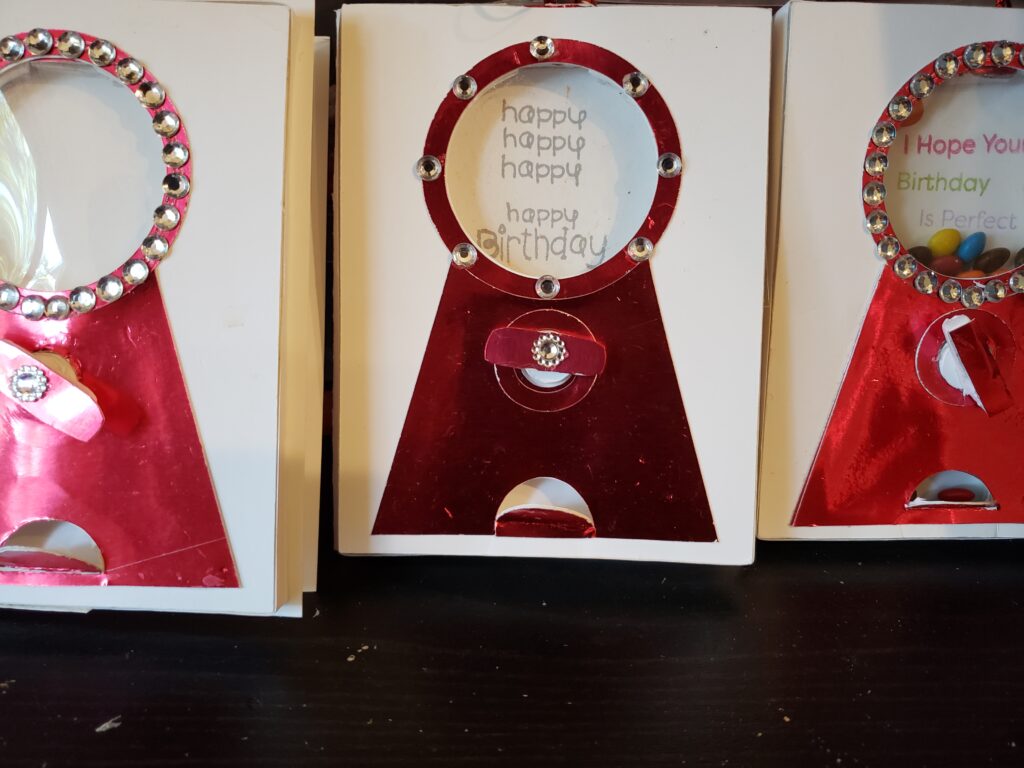
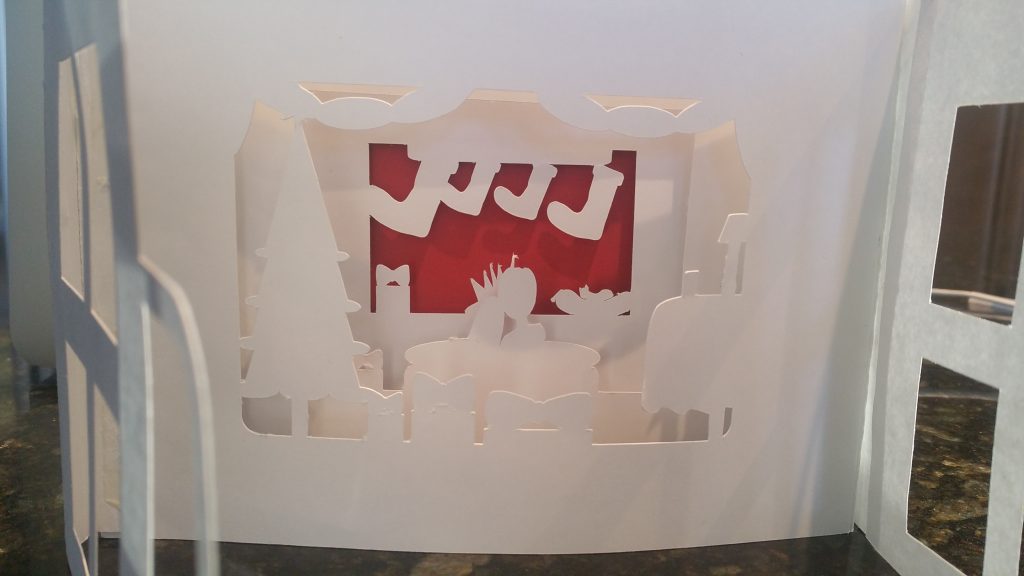
Have you seen those awesome shadowbox cards that are 3 dimensional and look like an artist, graphic designer and engineer must have collaborated to make it? Also You can buy these cards for $2.99 and more but why would you when you can make your own?

If you have not see theses cards then you are in for a treat because not only will someone love getting one from you, I will give you the basic template and you can customize as you see fit.

Shadow Box Card

Ok now lets back up a little and give you some ideas of what I am talking about and then we will go into what you need to make these cards. Below is a Christmas Santa card that I made a few years ago. Notice that there are layers and this gives the 3D effect. These cards are called shadowbox or tunnel cards.

Christmas Shadowbox card
Christmas Santa delivering toys

This Santa Card what cut on a Silhouette Cameo Machine, so for those of you who own a machine like this, I will show you how to use my template to make any card you like.

For those of you who don’t own a machine, I will show you how you can still make beautiful tunnel cards, just will a little bit extra work like the one below. This will be a separate post that I will put up later. In the mean time, download the free template and use any pictures or embellishments ….for all you know, you may end up with some tricks to show me!

So, for those of you with machines like Silhouette Cameo and Cricut, the first thing you will need is my template for the card itself. You will need to open the SVG file in Silhouette Studio. see my post here.

If you can’t open SVG files let me know and I will send the studio files.

Now that you have the template, think about what you want the card to be about and spend a few minutes looking for free images on Google. I wanted a beach scene as summer is on the way. Here are some of the images I found. I used the trace feature to trace them and then resized for my card.

In my free template, I included 2 images that looked like “hills” or “clouds” I use these to create different heights for each layer and welded it to my frame. Remember to ungroup the fold lines (dashed lines) before you weld.

Next I arranged my images and welded to card pieces. Below are the pieces cut out and compared to the template with no images welded.

Assemble

  1. To assemble the card bend all the fold lines.
  2. Lay the back piece flat
  3. Glue the tab of inner card so that it is up against the fold line. The tabs of each card is great for spacing if you place them right up against each other.
the inner card is glued so that the tab is up against the fold line
the next layer is glued right up against the edge of the last.
you can see the layers here
This is the back. the tabs have glue on then and we close the large brown piece on top and press down.
Shadow card with beach scene
Shadow Box: summer at the beach

Carolyn