Categories
Cards Celebrations Events Greeting Cards Kids Can Do Paper Pop Up Cards Service project Template

POP UP CARD: CAT

My popup card was made by the children when they went to deliver gifts of old blankets to the animal shelter.

This is an easy card to put together: if you are not using a cutting machine like Silhouette Cameo or Cricut, it will take a little bit longer to cut the pieces… but not a HUGE amount of time, as the pieces are big.

Here is what you need if you are going to make the card

  • 2 colour Card stock for the card
  • Scrap pink cardstock
  • Scrap red cardstock
  • 1 colour for cat head, and body
  • 1 colour cardstock for tag
  • pen
  • glue.

Cut out the pieces

  • Download the link to my template below and print out. You can use as is and cut the images out out use the image to cut your own colour choices.
  • the two card bases are cut from 2 different colours. I used pink on the outside and grey on the inside
  • Cut the body and head of the cat out of one colour cardstock
  • Cut the nose out of pink cardstock and Tongue out of red cardstock
  • cut the tag pieces out.
cat body and head, nose and mouth as well as the first inside card base

Glue it all

  • Use the smaller card base and glue the back of the cat with tail onto the top of the card, glue the paws down to the bottom of the card.( right close to the centre line where the card folds. Glue the middle of the cat on to the cat a little way down from the tail.
  • Next add the nose and mouth to the head of the cat.
  • glue to the head to the front of the cat .
  • Glue all to the body of the cat.
  • next write your message on the blank tag provided or print the tag with the quote of kindness to animals.
  • I used dimensional foam tape to attache two tags and then glued to front of card.
  • Glue the inner card with cat inside the larger outer card

Hope you card turns out fabulous!

Here is the link to the template to cut and use your own colours or print with my colours.

Categories
10 minute craft Baha'i Holy Day Ideas Celebrations Events Greeting Cards Kids Can Do Ridvan Template

A 10 minute Craft for Ridván

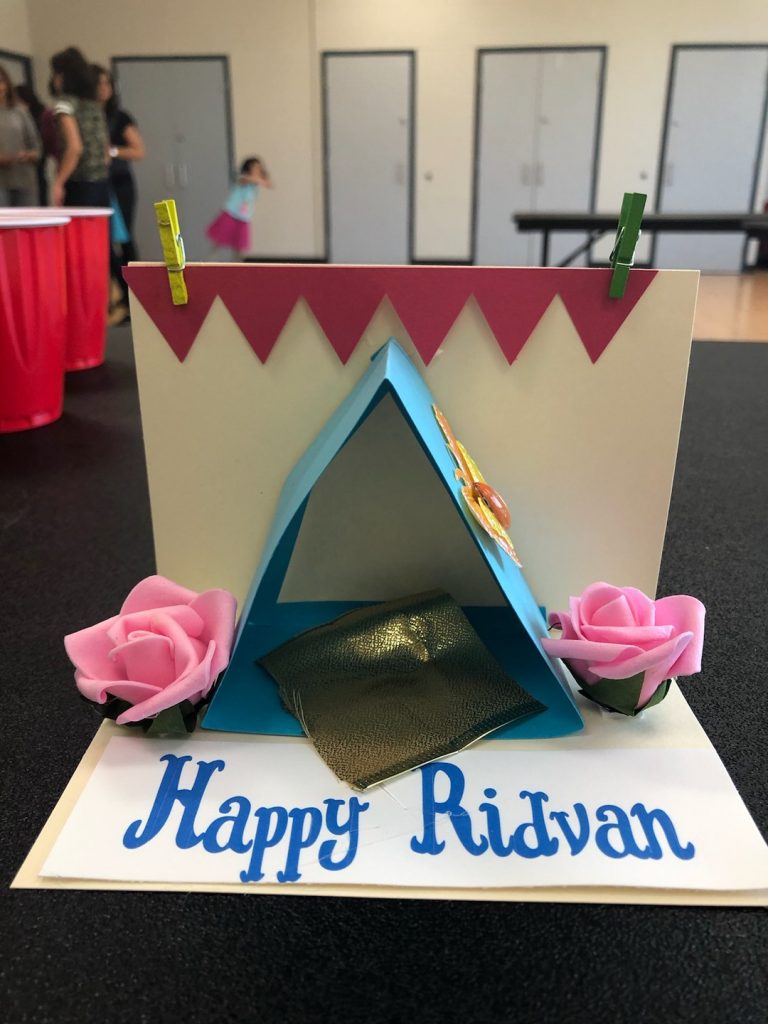
This is simple craft that you can print for Ridván for kids of all ages to do. This particular craft was put together at the Burlington children class.

The Parts

This is a small display of the Garden Of Ridván that consists of:

  1. The tent of Baha’u’llah
  2. A banner
  3. a “Happy Ridván” tag
  4. flowers
  5. Some embellishments of your choice.

What you Need

The supplies are very simple, for each display you will need:

  1. Cut 8.5 x 11 in half cardstock width wise. That means you will have a card that is 8.5 x 5.5. this is your Base. Use my template to print and cut.
  2. Cut a strip of paper 11″ x 2.5″ This is your tent
  3. cut a piece of with ribbon or material fo the “carpet”
  4. Print and cut the Banner
  5. Print out the “Happy Ridván” tag or write your own
  6. Print the pattern for the roses or buy from dollar store.
  7. Embellish with stickers , images from magazines or print and cut images you like such as butterflies, flowers, birds etc.

Assemble

The Assembly is very easy.

  1. First take your base that was cut 8.5 x 11 and fold in half so your card is 4.25 x 5.5. open it so that it is 90 degrees, you have a base and a back.
  2. Take the strip of paper that is for the tent and fold in half so you now have 5.5 x 2.5. Next on each end bend the edges back by 1″ to create a tab. Glue the 1″ tabs on to the base of the card to form a upside down “V” that will be the “tent”
  3. Put the mat inside the tent.
  4. stick “Happy Ridván” on base of card
  5. Glue flowers around the tent
  6. Glue the banner to the back of the card or use small clips to hold in place
  7. All any other embellishments you like such as birds, butterflies etc.

Template

Downloads the template in PDF, SVG and PNG here.

Categories
Baha'i Holy Day Ideas Celebrations Events Free Kids Can Do Template

DIY easy craft in 10 minutes: Kids can help!

I am always on the look out for an easy craft that kids can help with. I like crafts that kids, can do that are not just paper plates, tissue paper etc. Those types of crafts are nice but sometimes I want an extra wow factor. This year I was looking for a Naw-Rúz gift.

For those who have never heard of Naw-Rúz it is the Baha’i New Year, which falls in March, sometimes it is on the 20th and sometimes on the 21st. Many other people around the world celebrate this time of year also.

This year Naw-Rúz on the 21st  March and it marks the Vernal Equinox in the Earth’s Northern  Hemisphere and the Autumnal Equinox in the South—that day when the sun’s light strikes the Equator directly and illuminates every continent equally.

Shopping for Naw-Rúz is like shopping for any major holiday where gifts are exchanges. The shopping experience can be frustrating, fun, overwhelming, happy, sad… you name the emotion we most likely experience it. Like everyone during a festive season, we went looking for the perfect gifts. Although we did get great gifts, it felt like they did not reflect the holiday in a special way. For those of you with young kids, well I think online shopping looks very appealing right now and you are thinking there is no time to make anything personalized. Well read on and I promise this is a 10 minute easy mini craft for you and the kids.

My 6 easy steps to making a personalized pendant

So, here is what I decided to do in a few really easy DIY steps that even if you have newborn triples it will be finished in under 10 minutes, I promise (not including the purchase of course!) .

It took me less than 10 minutes to do 6!

Step One

I went to Michaels and found theses very cute pendants: 2 in a pack for about $14. The pendants are in the jewlery making section and I am sure any craft store will have something that you can use that is similar. Michaels always has a coupon so make sure and use it. This time it was 40% off

Package of 2 pendants: one round one square

Step 2

Next I printed a photo of ‘Abdu’l-Bahá the Son of the Baha’i Faiths founder Baha’u’llah) and printed it on white regular cardstock. You can of course use any photo or symbol.

I choose the photo and not just crystals or little heart charms because I remembered my two friends discussing the best gift they received as children. I am sure the gifts my friends discussed was not a photo in a costume jewelry pendant like mine, but they loved this gift from their mum! I think it was because it was so small and wearable and different from the other gifts they had received.

The photos of Abdu’l-Baha needed to be small enough to fit the frames.

If you buy the same frames, the size for the square frame is 2/8 inch and the round is 3/8th diameter.

Here is a link to my file for you to download and print. Or you can find a photo you like better by searching Google make sure that the usage rights allow for reuse.

Step 3

I cut the photos by hand. There is no need to be exact as they are so small little imperfections really do not show.

TIP: for cutting anything round, move the paper not the scissors, it is much easier that way.

Step 5

The next step is to remove the little mockup photo that came with the frame. I used this weeding hook I had with a piece of sticky tape, this grabs the insert really easily and pulls it out. You can also use a straight pin to push the photo out from the bottom of the frame

Step 6

The final step, put the images into the pendant. The square image inserts on the top. The round pendant opens on the side with a magnetic closure. The round pendant is also glass on two sides so the back of the photo shows. I decided to put a Baha’i symbol so the pendant can be worn either way. I have included it in my file for download. Cut the photo of `Abdu’l-Bahá and The Greatest Name and stick back to back then insert into the round frame

You are done!

You can stop here. What do you think? pretty easy DIY project right? I think it turned out beautiful.

I went and did a few extra steps.

Optional

I have some blank little bags that I will put the pendant in and so I will decorate them.

You can find little bags in the dollar store if you want to venture out or use my little rectangle box template: It should take about 5 to 10 minutes to print, cut and glue it together.

I have a few heart shaped boxes  in red that I painted white with dollar store craft paint. I am still deciding if I like this container for this special gift.

If you want a box to put your gift it, here is a link to my square template box with a lid.  Decorate it as you like.

Download Photo and small square box template here