Categories
Mini Album and Brag Books Paper scrapbook Template

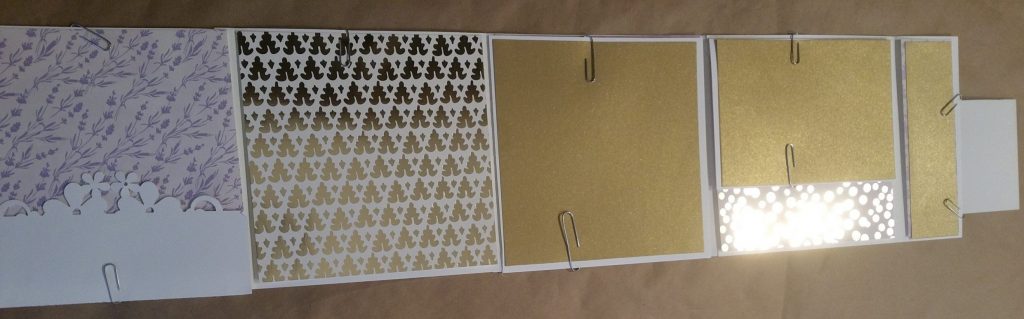
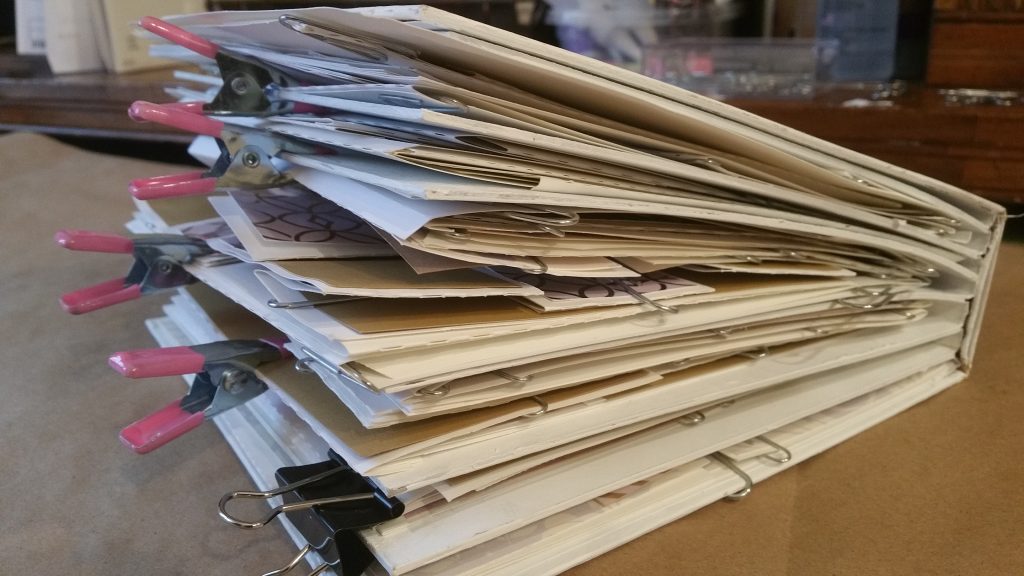
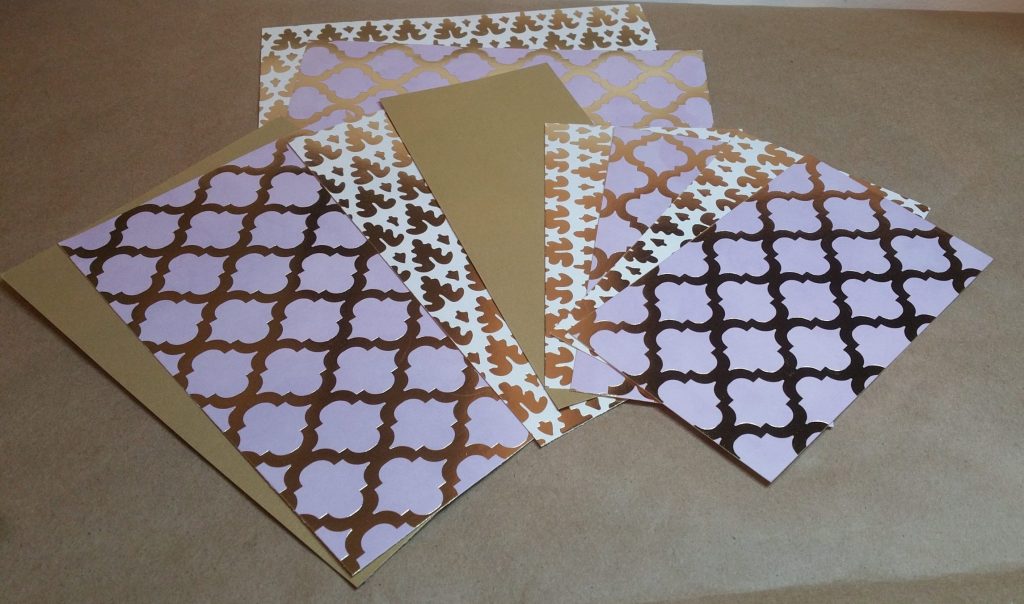
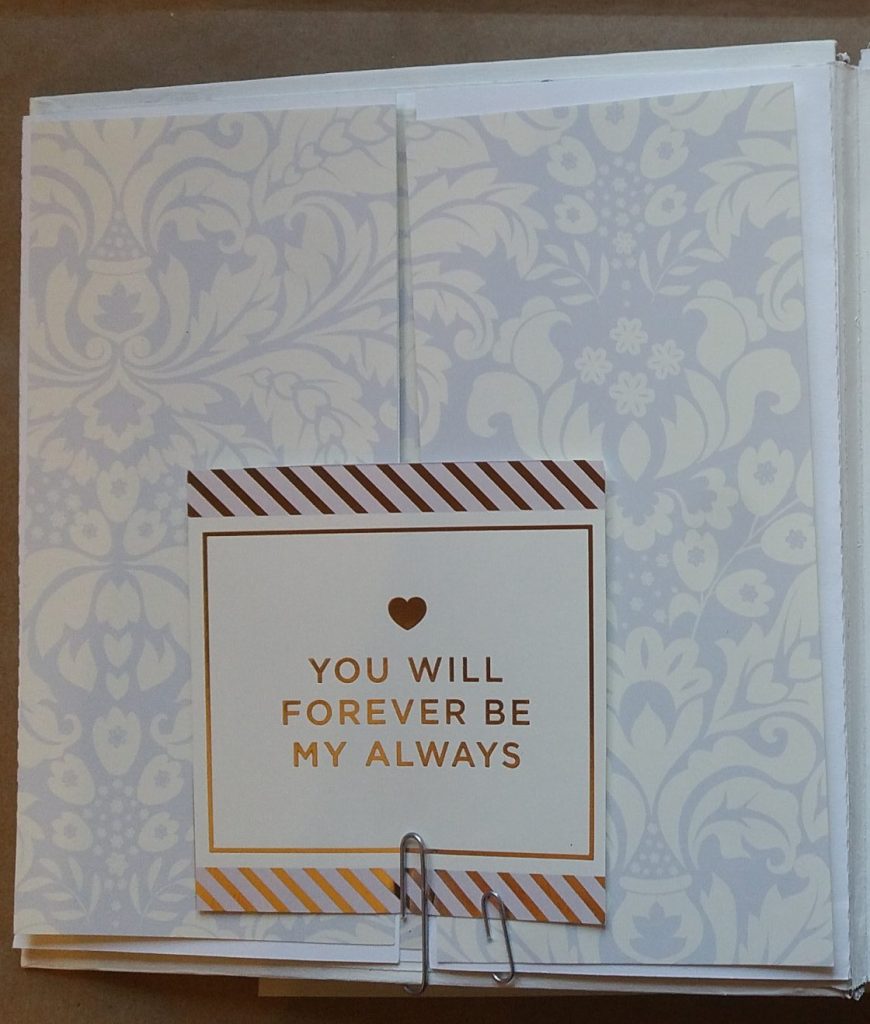
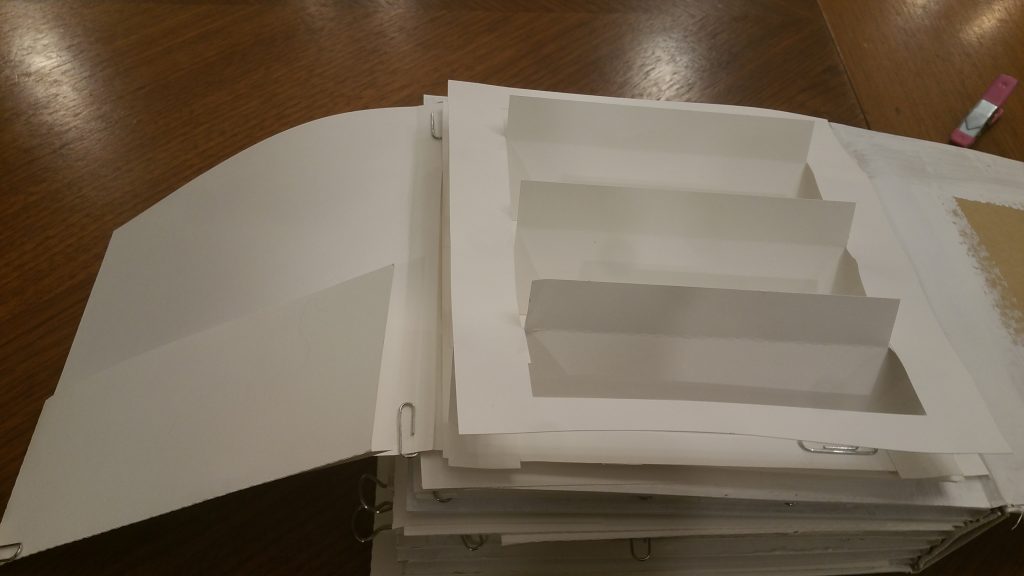
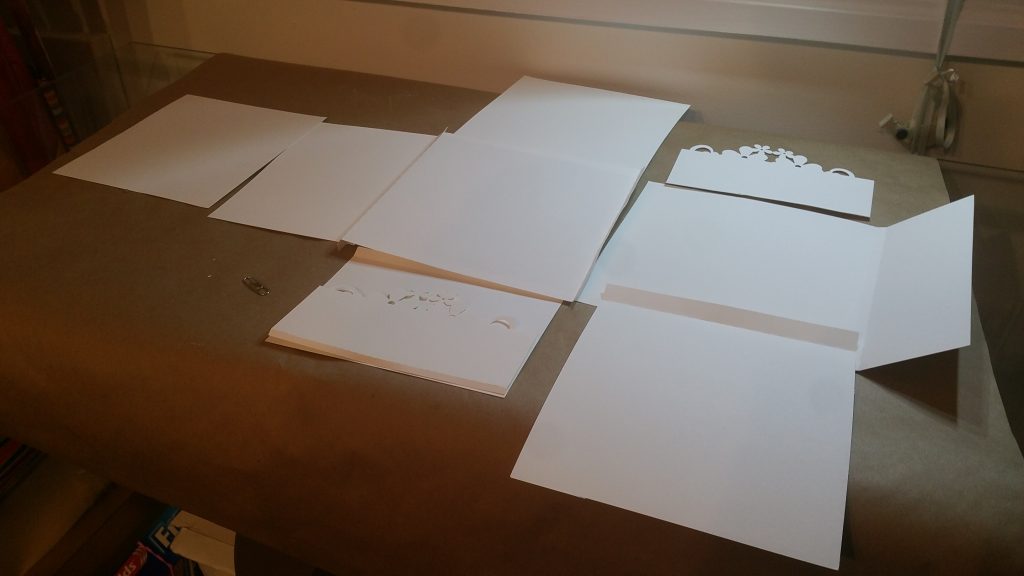
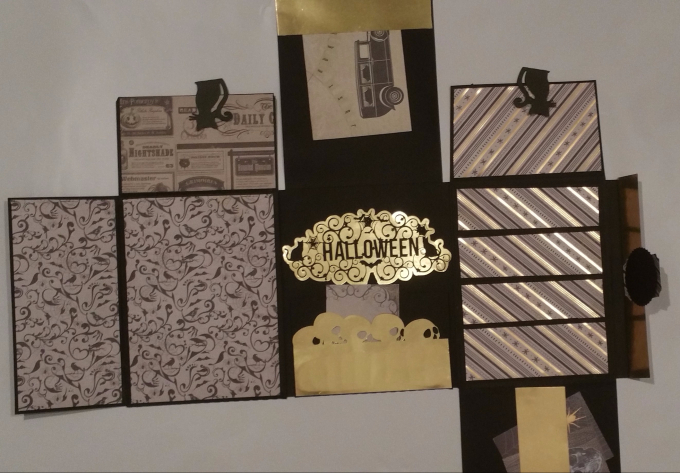
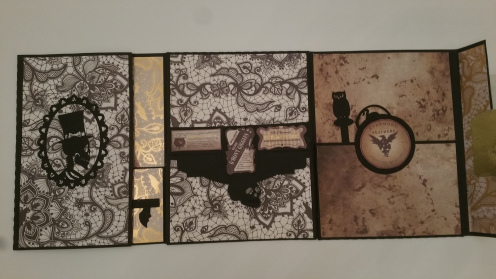
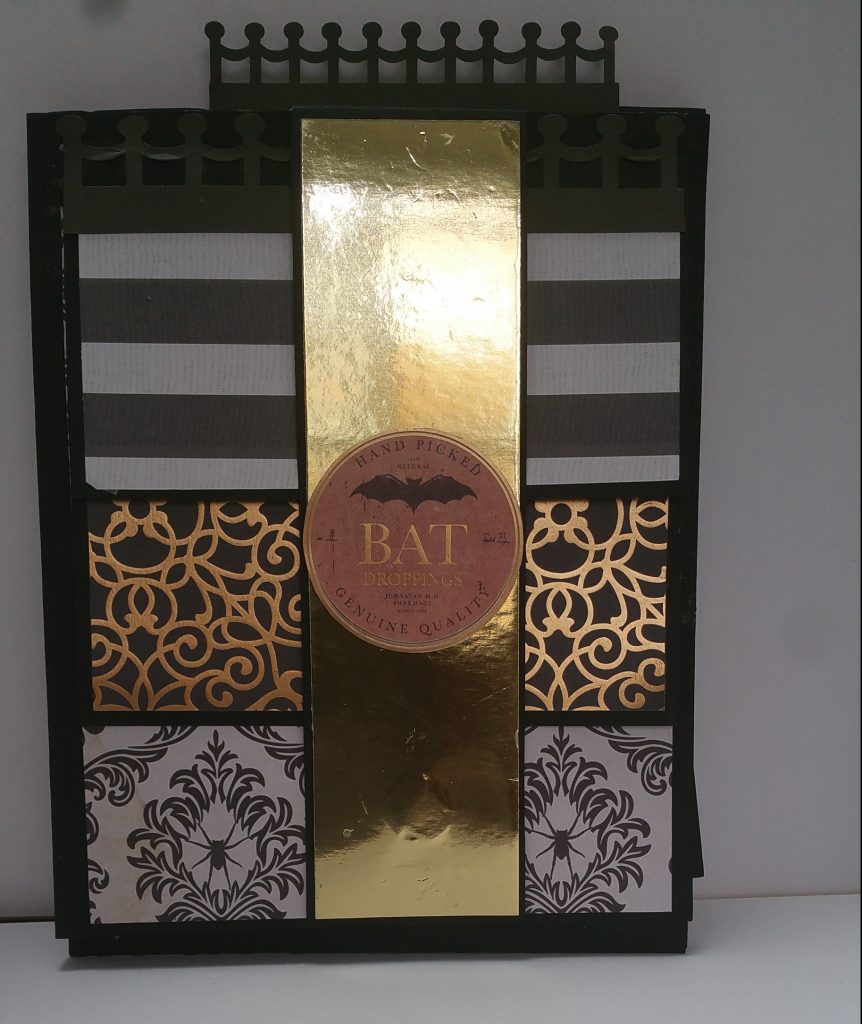
Steps to make 1 awesome brag book cover,spine and binding

You can easily buy a pre-made brag book, but why should ytou when it is not that hard to make your own.

The steps below are how I make my cover, spine and binding. I even threw in how to make my base page) These instructions are not the only method on how to construct a brag book and can be modified as you see fit so that different binding methods, types of base page and closures for covers can be used.

Some advantages of a pre-made brag book include:

There are advantages to purchasing a pre made brag book.

  • Come in many sizes and shapes
  • Make the process of making a brag book faster
  • The pages are sturdy
  • Finished book may look a little cleaner

Some disadvantages of a pre-made brag book include:

  • Does not offer the flexibility of sizes
  • Does not allow for custom pages
  • Does not allow for custom spine size
  • Does not look handmade just for you
  • If not readily available in your area, the shipping may turn out to be quite expensive

The brag book has 3 components:

  • The front and back cover
  • The spine
  • The binding.

The front and back cover:

The front and back covers are made up of three separate pieces

  • A sturdy inner piece,
  • the finishing outer cover
  • and the finishing inner cover.

So, it’s like a sandwich, the sturdy inner piece is sandwiched between two finishing pieces of paper.

Sturdy inner piece

For the sturdy inner pieces, you can use chipboard, cardboard or photo mats just to name a few possible materials.

My photo below is of photo mats that I have on hand and they work super well. The middle piece is the spine section: more about the spine later.

Steps to make brag book cover and spine

The outer and inner finishing covers are made from posterboard or heavy cardstock. Other possible material can be fabric, kraft wrapping paper or any other sturdy material.

Inner cover for brag book
Photo Mats cut to 9 inches long by 8 inches wide

Step one for front and back cover

Once you know what size you need for your brag book cut it out of your choice of sturdy material,

Step 2 for front and back cover

You now need to cut your material for finishing the front and inside of the cover.

The piece for the outer finished cover should be cut about 2 inches bigger all around than the cover , so if your cover is 8 in x 9 in your finished outer cover is cut 10 in x 11 in.

Step 3 for front and back cover

Apply adhesive to the sturdy cover and center it on the finished cover piece. Do this for both front and back covers.

outer cover for bragbook
Step 3: Front and back sturdy cover glued down

Step 4 for front and back cover

The edges that will not be connected to the spine can be mitered , folded and stuck down. That is to say, the top, bottom and outer edge of the cover.

Before we move on, let me quickly discuss the spine.

The spine size is determined by how many pages you will make and the amount of inserts each page will have.

What works for me, is to make all the pages first. Its seems like working backwards but it really does save you some frustration if you do it this way.

Base page

My base page is made up of two pieces of paper, one piece has 1/4 inch flaps to allow the two pieces to be attached together. It also allows for a space in between the two pages so that the page can be slip on to the binding ridge on open open end and can have a photo mat insert in the other open end if desired.

The photo below shows the 2 sections of a base page. You can also stick the two pages downto form a sturdier page and not have a photo mat insert. I use heavy cardstock of about 110 lb for these base pages.

Step to make base page

See an example of an insert here

View some of my other finished pages

Page 1

Page 2

Page 3

Page 4

Page 5

Page 6

Subscribe and send me a message of which page you want or request a special project.

[wpforms id=”1223″ title=”false” description=”false”]

Once my pages and inserts are complete, I will then know how big my spine should be.

For example, I made a wedding brag book and I thought I could use the readymade book I bought from Michael. As you can see in the photo below, there are way too many inserts for this book to even begin to close. I ended up making my own cover and spine and the spine that was 7 inches vs the 2 inch one in the photo below.

Too Big? All PAges
Way too Big for the brag book!

With the spine piece, it is important that the following steps be followed

Step 1 for spine

Cut out the finishing cover piece 2 inch bigger than the spine sturdy cover.

Step 2 for spine

Glue the sturdy spine piece on to the finishing spine paper making sure it is centered.

Step 3 for spine

Place the front cover up against the spine so that it is sitting on top of the the extra 2 inches of paper of the spine. Do the same with the back cover.

Step 4 for spine

Turn the brag book over and glue down the extra paper onto the front and back of the book.

Step 5 for spine

Turn the brag book over so the inside is face up and fold the top and the bottom extra paper of the spine piece and glue in place

The inside finishing cover

The inside finishing cover is cut so that it is about /4 of an inch smaller that the finished brag book.

Glue the inner finishing cover down before attaching the binding and pages.

Binding and pages

The binding method I am using consists of a 5 x 8 paper scored at 2 inches and 3 inches. this means that I have 2 inch on either side of a 1 inch section. This one inch is the space that will be between each page.

binding for brag book
Binding for brag book

These binding pieces are glued together for the pages to be slipped on and be held in place.

binding are joined together

What the binding looks like joined together

The parts that are sticking up like ridges can be made smaller: 1 inch is the smallest I recommend as you want the pages to be well attached to the binding.

binding glued together

What the binding and pages look like with pages

pages slipped on binding

A closer look

closer look at how the binding is inserted in page

Top View

top view showing where the photo mat insert can go

Attach binding and pages to spine

To attach the binding to the spine and cover, use lots of adhesive. I also use vinyl before putting the adhesive tape to give some more strength to the binding as the pages will be under stress with continued opening and closing.

prepare the binding to attach to spine

Once the adhesive is applied, line up for pages so that they are on the spine and the extra flaps are on the front and back page.

I find that holding the pages together allow me to have the best view of aligning the pages to the edge of the spine.

best method to align

In the photo below you can see the binding attached to the spine and the overlap piece glued to the front and back inside cover. This sturdy method of joining the binding to the spine and cover will give your brag book a greater “shelf life” when you consider the wear and tear that will occur when the pages are opened and closed.

Categories
Free Mini Album and Brag Books scrapbook

Extra Large and Long Page 4

Hey! not only is this page 4 as long as the other folios: about 34 inches long when expanded, but it also took me a long time to get back to cutting the matting for this page. Again, I think I need to make a new cover and spine as this book will not close! The folio below shows all the pages with large photo mats. you can add more pockets if you did not want so many spots for large photos.

To find all my Extra long pages start here: Page 2

To request any of the pages in SVG format send me a message.

[wpforms id=”1223″ title=”false” description=”false”]

Long Page 4

Again, this page 4 is a folio page that when fully opened is about 34 inches long. I did not open the flaps for this post as I am still rethinking the arrangement and bulk that these large folio pages add to my brag book.

Once I know where I am placing the magnets , I will take photos from start to finish: how satisfying that will be for me!

The photo below is the page fully closed up. The closure is from the paper pad I am using and will have a backing and magnet when finished so that the folio is held closed in the book.

long page for Folio 4 side 2

Long Page Starting To Be Visible

I really love paper and how it just folds, expands and become a 3d object. For this long page 4 , the narrow panel will open to the right.

narrow flap open to right
Extra Large and Long Page 4 starts to open

Folio Expands

The larger space could be used for a photo.

I think I will put some decorative cutting or a quote on this large space as a photo may get scratched on the front page .

This page and every other page in this folio will open to the left. What you are seeing below are two flaps (gold paper) that will open upwards and below are two large pages for photos.

I did not open the flaps for this post but will have finished photos on my last post for the finished product.

left page flips open left
Longer and longer

Large Photo Mats Continue

The page to the left, opens again to the left.

page on left open to the left again
Almost open all the way

The large gold page is a full sized flap that opens up and has space below the flap and on the page below for large photos.We are almost to the end of the opening of this folio.

What Do You think?

page to left opens again to the left.
Extra Large and Long Page 4 open all the way

Well, what do you think? It is an Extra Large and Long Page 4? The last page showing to the left has a pocket. Don’t forget that the back of these pages where seen before each page opened and will hold quote, journaling and photos also.

Yeah! on to the last two pages and then i will put all the magnets in, stick everything down and decide if to redo the cover and spine.

Join me in making the brag book! Subscribe, grab a file for free and make your own

[wpforms id=”1223″ title=”false” description=”false”]

Categories
Evaluating projects Evaluation of files/projects Mini Album and Brag Books Paper scrapbook

Too Big? Guilty Me!

Is my Brag Book page 3 and 4 now too big?

This will always a concern and issue for me as I love to have interactive pages that pop , twist and fold and that adds bulk to the brag book.

The paper clips are taking up some space but really and truly if I am being honest with myself, I am at page 4 side 1 and we are starting to look like a stuffed turkey.

And by “we” I mean my brag book.

Two Fixes For The Page Too Big Dilemma

  • One solution is to make my own cover with larger spacing between pages: The one I am using is one that is premade from Michaels.
  • Second solution is to remove some of the flaps, folds and slots and tags. (crying face here)

Recap of all the “Too Big” Pages

A quick recap will show that all the previous pages are almost the same size but the bulk is adding up and the book is becoming too big. (I admit it)

Below are a few of the pages in this wedding brag book if you need to review.

Remember you can request any page and I will send you the cut files. So Subscribe below.

[wpforms id=”1223″ title=”false” description=”false”]

Page 3 Side 2 is Too BIG

This page is a double tri fold shutter page that closes up and flips to the side to reveal more flaps that open and reveal a large area for a photo.

Let us look at it this page one stage of opening at a time.

The Big Double Tri Fold Shutter Page

This double tri fold shutter is 8 inches long when closed up and opens up to be 31.5 inches long. (That Is BIG) My template is based on a great Youtube video

The spaces are great for embellishments, small photo booth sided photos and the center is perfect for a 4×8 photo.

This is the big page sitting in the brag book

Too Big? Pages for Page 3b and 4a
My Brag book is looking too thick and I may need to make a custom cover!

This is a closer view of the page

Too Big? double fold pull out
closer look at page

Remember that the paper clips are there as I need to place my magnets.

This page had so many paper clips that it interfered with the opening and closing when I wanted to take the photos!

I stuck some of the matting down and I am pretty sure I made a mistake!!!

Will have to wait and see what happens when I attach the magnets.

One side Of This Page Opened Up.

Too Big? Double fold opening
one side of double fold page opened.

The Double Tri Fold Shutter Page Closed

When the double tri fold shutter page is closed up again, it all flips to the left and there is a space for a photo on the back and to the right are 2 flaps.

It was supposed to be 4 flaps: One flap opening left , one flap opening to the right, one opening up and one opening down…… but I have to admit that the bulk was way too much.

These two flaps open and there is space on the page for another large photo.

Now this page does not seem to be large but the double tri fold shutter makes it a little bulky.

Too Big? double fold page opens
Big Double tri fold shutter closed up and the entire page flips open to left
Too Big? Flaps open for a photo mat
Big page has room for a big photo

Page 4 Side 1

This page 4 is a folio and I did not use lots of pockets or slots for tag but left the pages with large photo mats.

To start with the photo below is the folio page all closed up

Too Big? Pages 4

Next Photo shows the folio opened one time to show the one and only pocket which I will re-cut a little smaller.

Too Big? Pages 4 open onec

Big page opened a second time

This Page is long like all the other folios in this brag book: around 30 inches.

Too Big? Pages 4 open twicw
Note the matting can be changed around

The matting can still be be changed around. I have not yet decided on what I like. ( Feel free to comment here)

Too Big? Pages 4 open third time
Big Folio opened onephotos

Back of pages

The back of the folio will hold 2 large photos. ( the flower paper)

In a wedding brag book you really do want space for all the large photos.

Too Big? Pages 4 back pages
You have 3 full sized pages with mats for photos on the back of this folio
Too Big? Pages 4 folding up
closing it up again

Well that is it for these two pages: Page 3 side 2 and Page 4 side 1. That leaves us with Page 4 side 2, Page 5 and 6 side 1 and 2 and the back cover.

I am almost 100% sure I will need to make my brag book cover and base pages to fit what I have made so far as I love all the pages and DON’T WANT TO DOWNSIZE MY BOOK!!!!

Got that out of my system!

Please Subscribe for your favorite page layout!!!

[wpforms id=”1223″ title=”false” description=”false”]

Categories
Free Mini Album and Brag Books Paper scrapbook Template

Yes! 123-Easy Layout Change

I cut the mats for page TWO side ONE and while I was doing so changed the layout back to what I originally had in the Halloween Brag book as I liked the look and feel of that page. The second side now needs a revamped look. Changing the layout is as easy as 123!

Before I get to what I did for each side, lets recap.

Original Layout

The Halloween brag book page TWO side ONE : read what this page was like in the post or look at the photos below and you will get an idea of how the flaps open.

Step 1: Finalized Page TWO Side ONE Layout

Page TWO Side ONE had the following elements:

  • Belly band
  • Waterfall pages
  • Entire waterfall pages flipped to the left and there is a slotted page to hold tags.

The first step was to get all the pieces back together, everything I needed was already cut, only assigned to different pages.

I put them all back together so we have the same layout as the Halloween brag book for the wedding themed brag book.

Note: I flattened the slotted insert: the original insert was 0.250 of an inch thick and I was concerned that this brag book could not accommodate the bulk.

The tag I made may change and I used the method here to attach one of my files purchased from Silhouette Design Store. There are many other places to get images, I get from Creative Fabrica when they are free. Like this wedding set that was free and is now $15!

Page Two Side One is back on track all mattings cut and looks like the original.

Step 2: Remember Page TWO side TWO?

For a quick recap of what Page TWO side TWO was going to look like read the post here.

These are the photos below of what I was going to do: The two envelope pages are paired with the slotted page. This will change and I will show you what it changed to.

Finalized Page Two Side Two Layout

Already cut were:

  • The two envelopes.
  • The base page cut

Added:

  • 3 extra pieces of paper, a cut here , a fold there and Voila! 3 flaps to position as I choose!

Step 3: Layout the pieces:

  • The envelopes will flip open to the left,
  • There is a similarity to the Halloween Bragbook in that we have the pages that flip open but not quite in the same manner.
  • I also used a small flap that will go on top of the envelope. This was done to reduce the number of magnets. With this flap keeping the page closed, I need less magnets YEAH!!!

BTW, why are the matting not stuck down?

MAGNETS! or lack of magnets at this point. I am using magnets to hold my pages closed, but you can use ribbon or any other method.

My photo show the matting of the pages not yet stuckdown, as I need to make sure where to place the magnets before I finalize the pages.

Don’t worry, once I am finished showing all the pages with the matting, I will post the finalized pages…hope to keep the pages as they are and not have any last minute change of heart!

Extra

The basic steps 123 above are all you need to change any page in this 8×8 brag book: all inserts, flaps, pockets and envelopes can go on any page, in any order.

Photo below is the small flap positioned differently:

Layout: small flap and envelope 2
Small Flap layout 2

These are all the elements separate with matting for both sides.

  • Small Flap side one and two
  • Medium Flap side one and two
  • Large Flap side one and two
  • Envelopes side one and two

Subscribe and request any of my files!

[wpforms id=”1223″ title=”false” description=”false”]

I hope you enjoy making these pages.

Regards Carolyn

Categories
Mini Album and Brag Books Paper scrapbook Template

Customize A Page Fast And Ease

The fun part has begun: this is where you get to customize your pages with pretty paper. I am using paper from Michaels and I am glad I got two 12 x 12 pads of Westeria paper! The silver is being replaced by gold as the paper pack has gold accents.

some possible materials
paper and Vinyl

Recap

A recap of my cover page and page 1 side one can be found here.

My last Brag book was a customized Halloween book.

Tips to Customize a page

Here are a few things to keep in mind when you are ready to customize your brag book:

  • If you are using paper to customize the look for your brag book and your paper has a pattern, you will need more paper for laying out the page matting if there is a direction that needs to be consistent. So buy enough! For example, my inside cover page, it really is not noticable if the direction is switched around a bit….there is a difference but only if you are paying attention
  • Some paper can be as thin as copy paper but some may need to be cardstock thickness. The thinner paper can be used to cover pockets and inserts and even for some of the matting.
  • In the photo below , the adhesive may show if it is left as is. That may not matter once a photo is placed on top but to give the brag book as a gift and it look messy…not cool! Therefor, use the correct adhesive such as double sided tape and if using liquid glue, use sparingly.
  • A personal dislike is when using patterned paper, using too many patterns or colours. This is very personal and to me it clutters up the design. SO…Know who the end user is of the brag book is and decorate for them not yourself if possible…very hard for me to follow!
  • How will your flaps etc. be held closed? You can use belly bands, magnets ribbon to tie and many more options. Before you finalize your custom page, make sure you have taken into account your closure method.
  • There are many items other than paper you can use for a customized look, tags, pockets, embellishments, journalling , stickers etc. I used many designs from the Silhouette Design Store and then customized them for my project
Customized inside cover open
There is a pattern…..

Customize the inside cover

The preview above was the inside cover page opened to reveal the large space this can be used for a larger photo.

The two flaps can be used for journaling, smaller photos, or decorations.

Any of the pages can have additional inserts added to them such as pockets, pull outs , 3d pop up etc.

Do you remember the inside cover before we started to customize it?

My inside page is closed in this photo and I may include the closure tag with the quote. Once I am ready to glue all the paper down, I will position my magnets.

Customize Template Page
This is the inside cover
Customize the inside cover
inside page open
Customize the inside cover open
customize the inside cover page open

Customize Page 1

Opposite the inside cover page is side one of page one. I am using a little plain gold cardstock to customize some of the elements like the gate below. May look like kraft paper but it has a little sparkle to it.

customize the pages: side by side view

The gate will also be held closed with magnets and when opened has a pocket and a tag.

Close the gate up and the whole thing flips down

Customize gate page flips down
Page 1 gate page flips down

There is space when opened for 2 large photos or again, you can customize them with pockets etc.

The gold page flips up

Customize page flips up
customize the flaps

So again there is the opportunity to customize the page with just beautiful paper or add inserts like pockets, flaps, slots, journaling, quotes etc.

Subscribe below for my files

[wpforms id=”1223″ title=”false” description=”false”]

Categories
Creating files Free Mini Album and Brag Books Paper scrapbook Template

Easy Brag Book Page

For the last page of the album, I wanted easy to cut pieces , simple layouts that had lots of space.

Easy Page layout

Easiest layout for 8x8 album about 40 inches long

This layout is about 40 inches long! it is actually the longest yet but super easy to cut. The pages that make up this layout are all very similar in size and could be simplified even more.

This easy of layouts is made up of:

One narrow flap

Two pages with fold lines on the right and left hand sides.

One insert that I am considering to add to one of these pages is a waterfall feature and maybe even a popup feature to give a “WOW” factor.

Two pages with score lines on one side. You can use both pages in just one size or like mine, have both sizes.

There are two pages that have no score lines for folding and can be used in just one size or in two sizes like the photo below.

Two small flaps

Easiest small flaps

Easy pockets for a page

For the next side of this page, I am using a simple set of pages that open like a folio or accordian. I will attach pockets to these pages so that they have a custom look and feel. With my pocket template files, it is easy for me to change the look and feel of any of my pages.

multiple envelopes
This is the envelope page flat on side two on page six

The page is folded up

open to left, pocket and blank page

Open to the left, there is a pocket on the left and a blank space to the right

The whole thing then opens to the right and there is a pocket attached to the base page.

I may use the shutter page on one of the blank pages and not on the back of the album cover: will think more about it.

I am so excited to move on to the next stage of gluing this down and adding the decorative paper.

Hope this made sense, and if you would like any of my files, let me know.

[wpforms id=”1223″ title=”false” description=”false”]

Categories
Celebrations Creating files Free Greeting Cards Mini Album and Brag Books Paper scrapbook silhouette design store Template

Grab the Free Folio Now

Folios are multi use pages that I love! and free files are dear to my heart so put them together: Free Folio can’t be beat! See my Halloween Folio. These folio pages can be used as mini albums, an interactive greeting card with photos, or as I am using them here in the wedding brag book.

To grab your free folio, subscribe below and tell me you want free folio page 4 side 1 or side 2. These will be generic and you can customized them yourself.

[wpforms id=”1223″ title=”false” description=”false”]

For page four I am using two different folio pages one for each side.

Although these folios are the same as my Halloween layout, they will look different as I customize the flaps and envelopes and also may rearrange the order the pages and flap attach to each other.

Free Folio Page 1

Both free Folios files available for page four have lots of flaps and pages and close like a book. When opened all the way the folio is an impressive 30 inches long!

Since nothing is stuck down, I may still rearrange the flaps and pages to be slightly different from the Halloween Folio. I will only know for sure when I start gluing it all down.

Customize Your Folio

I may add more pockets and tags but in the mean time, the customization done so far is :

  1. With the flap, I use a file from silhouette design store: snapdragon snippets is one of my favourite designers and I used one of her flourishes for the flap.
  2. On the pocket, I use a wedding cake I found on Google for free.The weld technique can be seen here

Free Folio side 2

Like Folio 1, Side two is about 30 inched opened up. Due to the bulk, I may move this page anywhere and swap the layouts with one of the first 3 pages to prevent the brag book becoming too bulky and hence unable to close.

Although this page for side 2 is the same size when opened up, there is slightly more space for photos due to the longer flap. If you wanted even more space,,you could make all the flaps long

Photos of Folio side 2

Again, this folio opened all the way out is huge and has a lot of space for photos and journaling.

More Customization for free folio possible

Seems hard to belief that you can add more to this layout but you will be surprised! In the Halloween layout, I used a slotted inset for tags and in this one I may use a file I have been working on that is super interactive! Pulling tabs that make stuff move gets my blood moving!

Keep following me and subscribe for your chance to get any of my files I make and post.

[wpforms id=”1223″ title=”false” description=”false”]

I am also going to sell the entire package soon if that is what you are looking for. Note that you can make your entire brag book with just one layout! does not have to be so many different pages like mine.

Keep crafting and I look forward to finishing pages 5 and 6 so that we can get to the really fun stuff of decorating it all.

Here is a quick look at some of my past pages that you can request the file for free when you subscribe.

  1. Page 1
  2. Page 2
  3. Page 3

Regards

Carolyn

Categories
Mini Album and Brag Books Paper scrapbook

Inside Cover and Page One

Inside cover

The inside of the cover will be a simple gatefold opening to allow for a photo or wedding invitation to be displayed.It does not look like anything much now but I hope a cute closure (ribbon or magnets) and paper will make it look really good.

Page One Side 1

Like the Halloween brag book page one, There will be a gate that opens and underneath is a pocket and tag. For the wedding theme, I am using love birds to embellish. My paper cut overlay is from the Silhouette design store: LOVE BIRDS LAYER CARD by Daniela Angelova #162094. The pages are slightly different layout but all the same pieces as the Halloween page one side 1.

Screenshots of digital files Page one side 1

Page One Side 2

Again, I am resizing page 1 side 2 of the halloween Brag book to fit the 8 x 8 page dimension. This side has some foldout pages and pockets.Once more I am redoing the actual manner in which I attached them to give a slightly different look.

Screenshot of Page One side 2

Please subscribe below as I am always posting free templates .

[wpforms id=”1223″ title=”false” description=”false”]

Categories
Creating files Mini Album and Brag Books Paper scrapbook

Wedding Album/Brag book

When I was making my Halloween Brag book I had this wedding album in mind, and although the dimensions are different (8 x 8) from the Halloween brag book, I knew that the digital files were going to be very easy to modify.

The album base I got on sale in Michaels and painted it white. so I did not build my own cover , spine and binding. If you want to do so yourself I cover it here.

I wanted to cut ALL the inserts out for ALL the pages and then start assembling and photographing the pages and posting BUT got to page three and looked at the amount of stuff I had cut out and WOW… I am starting to get a bit confused as to what goes were!

So, I am pausing all of that the cutting madness to go through the album, of what I have so far, and catalogue it here on my blog.

I will post both my screenshots of the modified files and the cut files. Note that there is no decorative page matting or embellishments cut out yet and I will post each page as I assemble them

The Album Base

As I mentioned, I did not build the base album from scratch but got this one on sale in Michaels. My Halloween base was built from scratch and if you want to make your own you can review the process here: Brag book Base

I am trying to keep all the pages as close to the Halloween layout in order to show how ease it is to adjust the digital files I developed. I may rearrange the layout as I go along to illustrate the flexibility of these files, because I know I won’t be able to resit reorganizing them!

Paper and Embellishments

  • Base pages white Cardstock 8.5 inches x 11 inches from Recollections 65 lb. I was going to use the heavier weight Cardstock but I think it will make the album too bulky.
  • Decorative paper for matting is Recollections Wisteria 12 inch x 12 inch.
  • Decorative paper from Dollar tree Metallic silver 11 inches x 14.28 inches come in a pk of 5 different colours for $1.25
  • Silver Vinyl
  • Embellishments love birds purchased and free.
  • Other wedding symbols to be determined
  • Quotes to pint or cut to be determined.
  • Magnets for closures
  • Ribbon and other nick knacks as I find them

Will add as I go along but this is the basics of what I intend to use.

Measurements for this project

  • The Cover Measurements : 8 inches x 8.5 inches.
  • The base page will be 8 inches x 8 inches and allow for a large photo mat 7.75 inches x 7.75 inches insert.
  • The matting for base pages will have a 7. 75 inches x 7.75 inch

Subscribe below and get my free files

[wpforms id=”1223″ title=”false” description=”false”]

Categories
Mini Album and Brag Books Paper scrapbook silhouette design store Template

Folio Page 4 :Best Brag Book

The folio for page 4 side 2 is now all glued together, In this post I will walk you through exactly how this folio opens and mention any changes I made or options for layout.

Recap of Folio

Side 2 of page four is complete: a little final gluing down to be done, but I am OK with that! If you are just getting here and want to see the other pages and templates take a look here:

Use this Folio

  1. The folios can be used in many ways. Side 2 of page 4 can be a stand-alone folio, and so can page 4 side 1.
  2. A lovely mini photo album to give as gifts.
  3. Add your own photos and give as a very elaborate greeting card or
  4. attach as to a page in a brag book: like we are doing here.

This is what it looks like all closed up. You could put a photo here on the cover if you wanted… maybe put a photo mat on top then the photo.

Pages of this Folio

  • Cover for page 4 side 2. The folio is all folded up in the photo below and has a magnetic closure.
  • Next, open it up . The tag “the Witch Night Party ” is a magnetic closure.
  • The large piece front page can also hold a photo if needed folds
  • The cover opens to the left.

Opened Folio up once

  • there is a pocket on the left.I welded on the skull and candles to the pocket. If you would like to try this my post on how to weld items is here.
  • On the right is a flap with a cat tab attached. The cutout pieces are from the scrapbook paper and can be used as spaces to hold notes or small photos.

Opened up twice

The left piece opens and there is a half page with a cutout candelabra, this page could be matted and used for photos or any of the flaps in this insert can be eliminated.

The central panel is a cutout Halloween scene, small tags can be slipped into the cut sections and the oval-shaped moon can be used for a photo… It is not glued down yet (notice the paperclip?) Both candelabra and Halloween scene are cut files from the Silhouette Design store

Let’s open The Folio for the third time

  • The half page on the far left is matted and can be used for photos.
  • Next to this is a page with a flap that has a cat tab attached, this pulls down .
  • For the rest of the pages on the right, the view has not really changed much.

Fully opened Folio: all flaps open

Middle Flap opened

Ok, we are getting to the end of all the flaps and folds…here it is all opened up.

NOTE: it is NOT upside down, it was not 100% glued down and at the very last minute, I changed where i wanted the flaps to be on this last folio page. The template digital files are flexible that way, Changed how the flaps are attached, the number of pages, pockets…each time can be a different look and feel using the same cut files.

My layout when I cut the cardstock was arranged differently, see the post here

Things to note

  • The middle page flips up and the gold “Halloween” cut out file is from Silhouette Design Store.
  • The pocket with skulls (GOLD) can be a flap that folds down instead.
  • The flap on the top has a narrow pocket to hold items.
  • On the right, there are slots for tags that can hold photos…I need to cut the large tags for this.
  • The bottom flap got cut off in the photo…it has a magnetic belly band to hold items.

Subscribe for my file

Really liked this Folio? Subscribe and send me a message: “I want Folio page 4 side 2 and its yours!”

Have fun

Carolyn