By BEGINNERS 101 I do mean me! Yep, this is my journey into the world of stamping and what not to do as well as tips and suggestions of what may help. For those of you who are like me, and collect projects on Pinterest, pin them to your board, and just never get back to actually doing anything with it. Well, read on. Maybe you are also just too intimidated by it all,? Me too! so today I will share a few tips on how I finally got started.
Tip 1
So many stamps out there where did I start? I admit that I went to the dollar store, who can resist the price, and stamps are stamps, right? So I got a few very cute-looking stamps, dropped them in my draw, and there they stayed for a few years. Why? Well here is why… I think! I was shaking in my boots at the prospect of inking the stamps, what ink to use, how to keep it all lined up? That, and more gave me a headache- literally. So tip 1 to myself and anyone reading this is: don’t be afraid to fail. Most of the dollar store stamps come with ink pads, grab some scrap paper and start inking and stamping. Our goal is to get comfortable with the process and learn from what CAN go wrong. To sum it all up: take out the supplies and stamps you have at hand and start stamping them on paper. It will not be a masterpiece but it will ease you into the process.
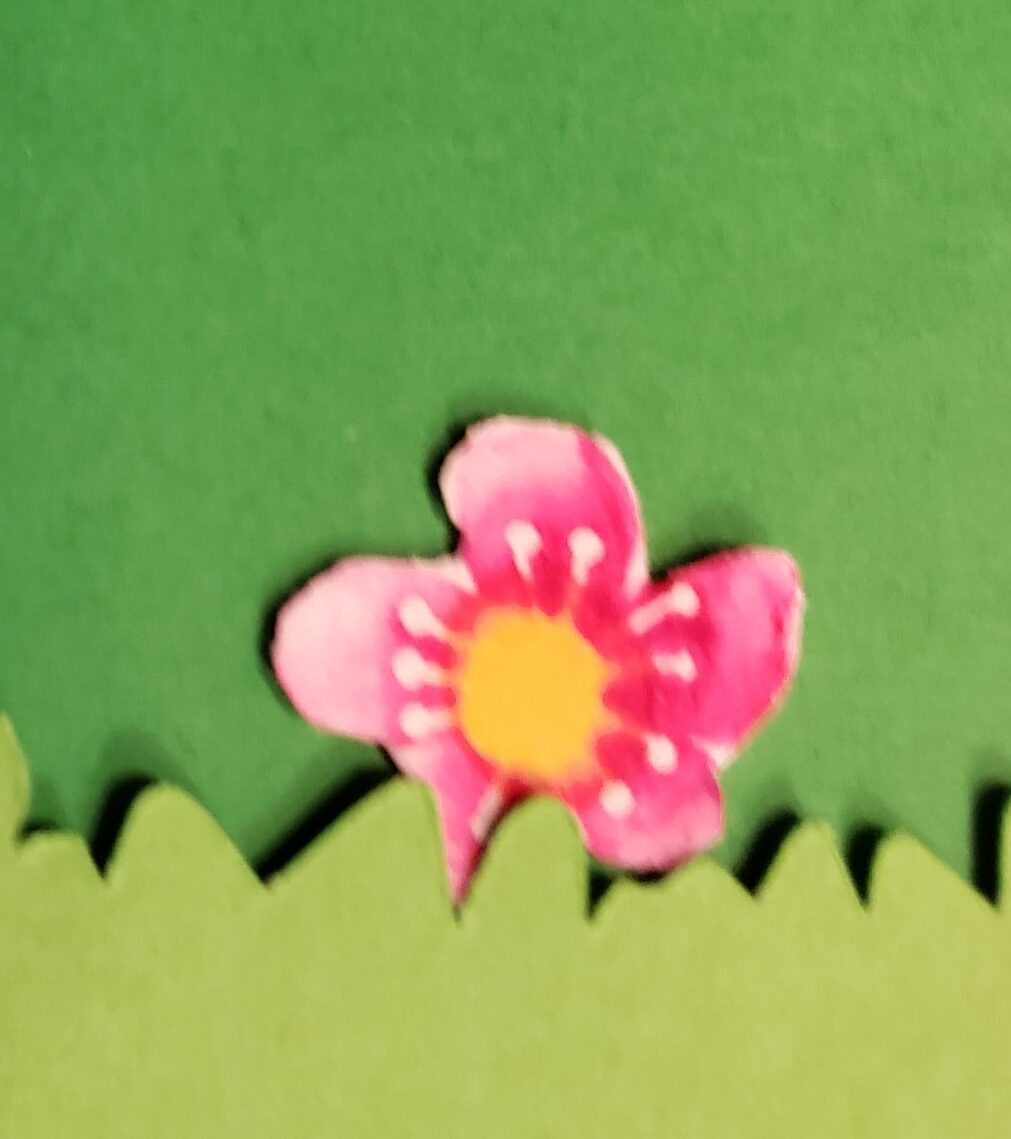
My Dollar store stamp: A little itsy bitsy flower that was a challenge to cut from the thick cardstock and my coloring is not pro but I like it!
Tip 2
So you stamped a few images and you are not impressed? Yeah, that was me also. I was thinking
“What’s the hype all about?”
carolyn moshtagh
I think I felt this way because the stamps did not excite me, and also, I was still not sure where to use these stamps. Most people use stamps on greeting cards and scrapbooks. My favorite type of greeting card is interactive, dynamic cards. These flat stamps were not exciting to me. If you are ok with flat greeting cards and this is not a drawback then you still may have been wondering where to actually use these stamps. So GET excited, when you find a project that uses a stamp that excites you, try making it. I first saw a stamped card and it was not interactive, it was just a flat stamped card, but something caught my attention. It was a scene of some older girlfriends and a funny quote. I LOVED it, it spoke to me and I could see myself producing a card with this stamp on it.
So my Tip 2 is to check out Pinterest and pin all the ideas, then choose one idea and commit to making it.
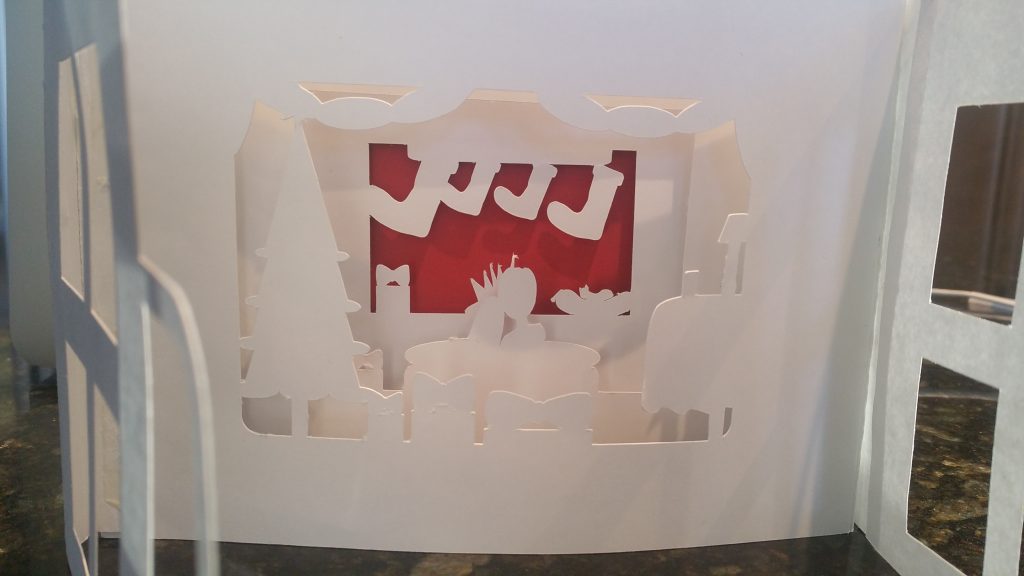
Following my own tip, I made a double slider card , stamped a few cute images from My favorite Things stamps and dies and Voliá!
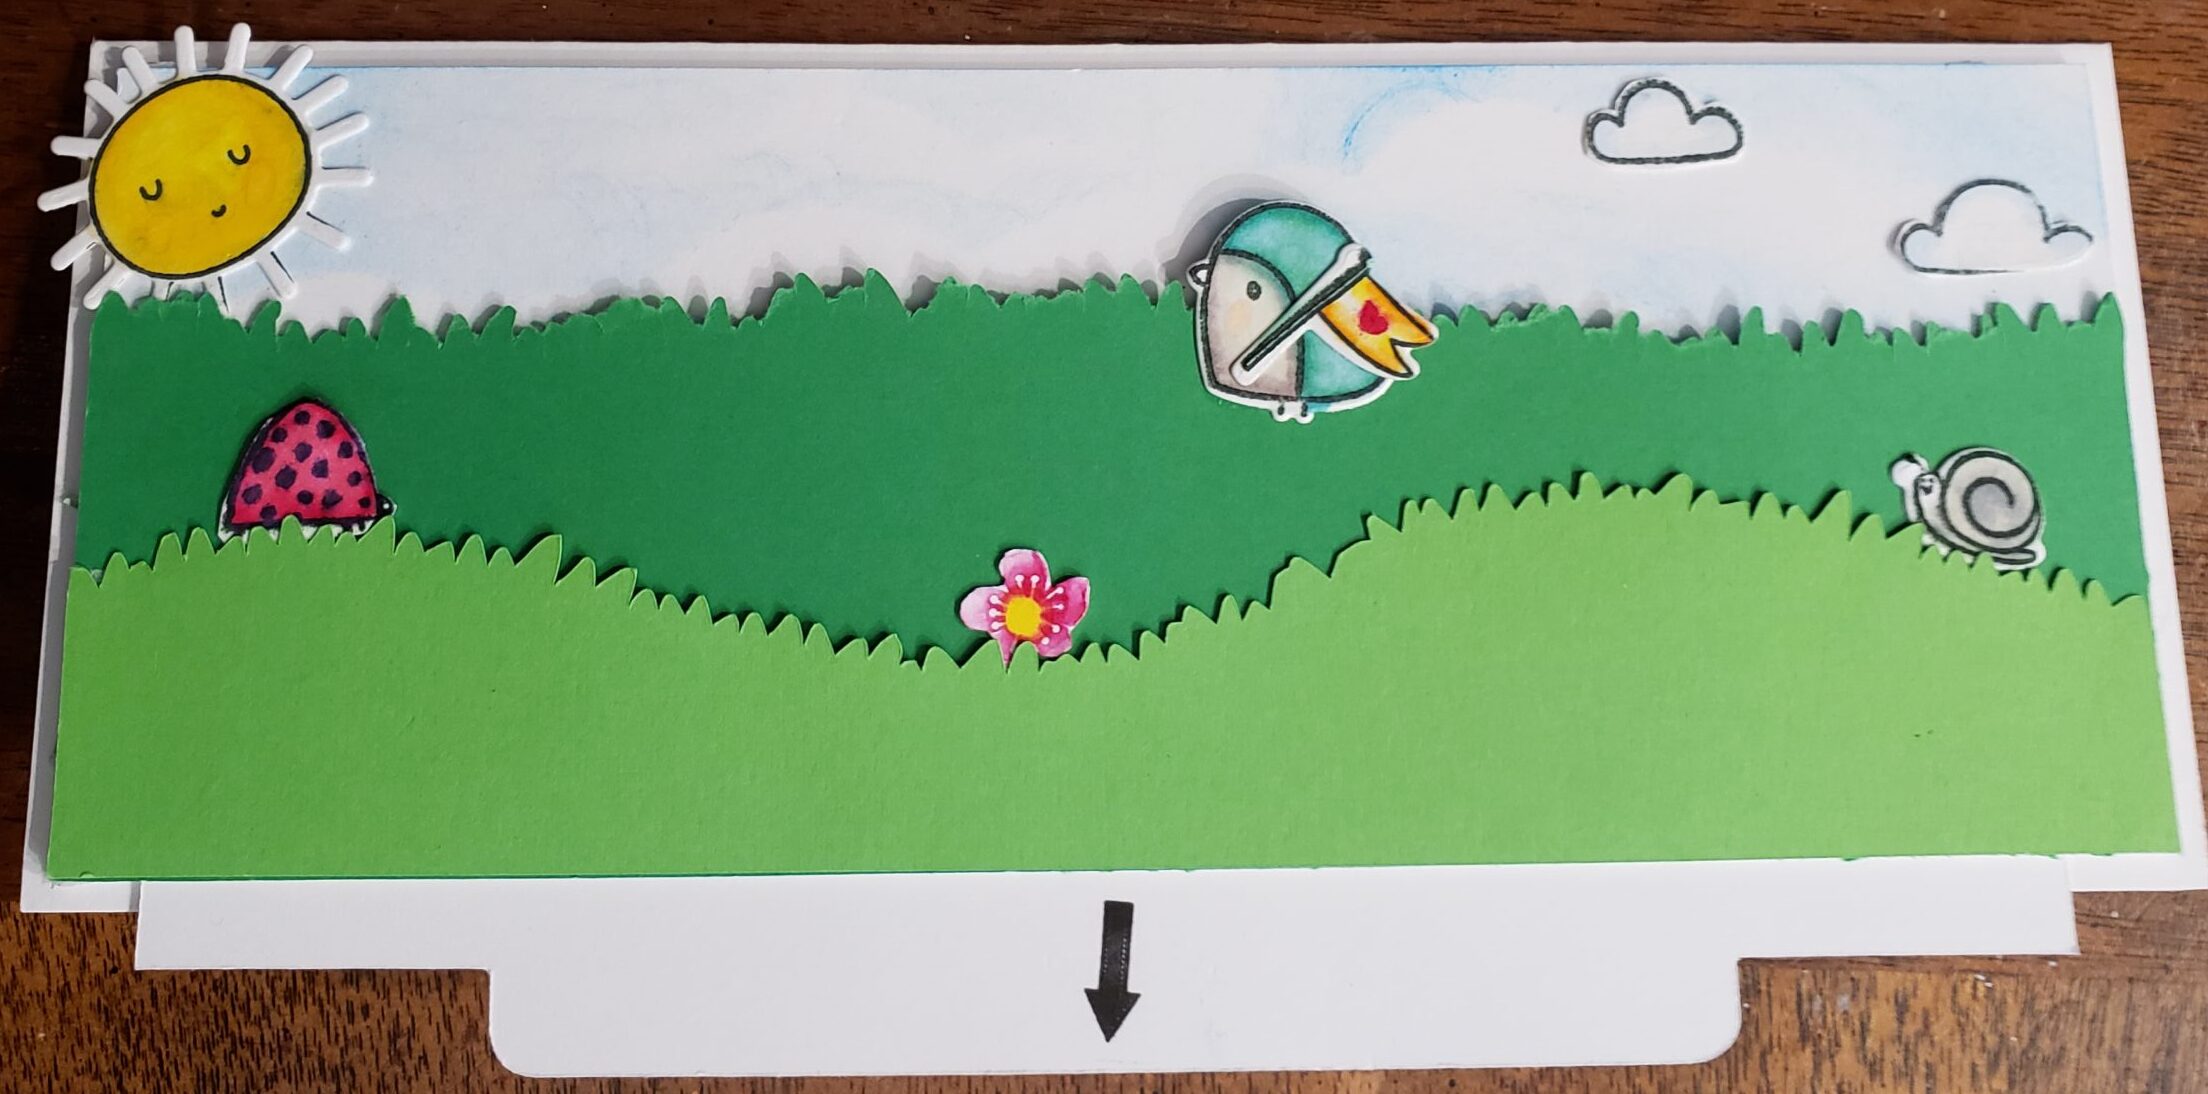
double slider card with stamped images and slide up text 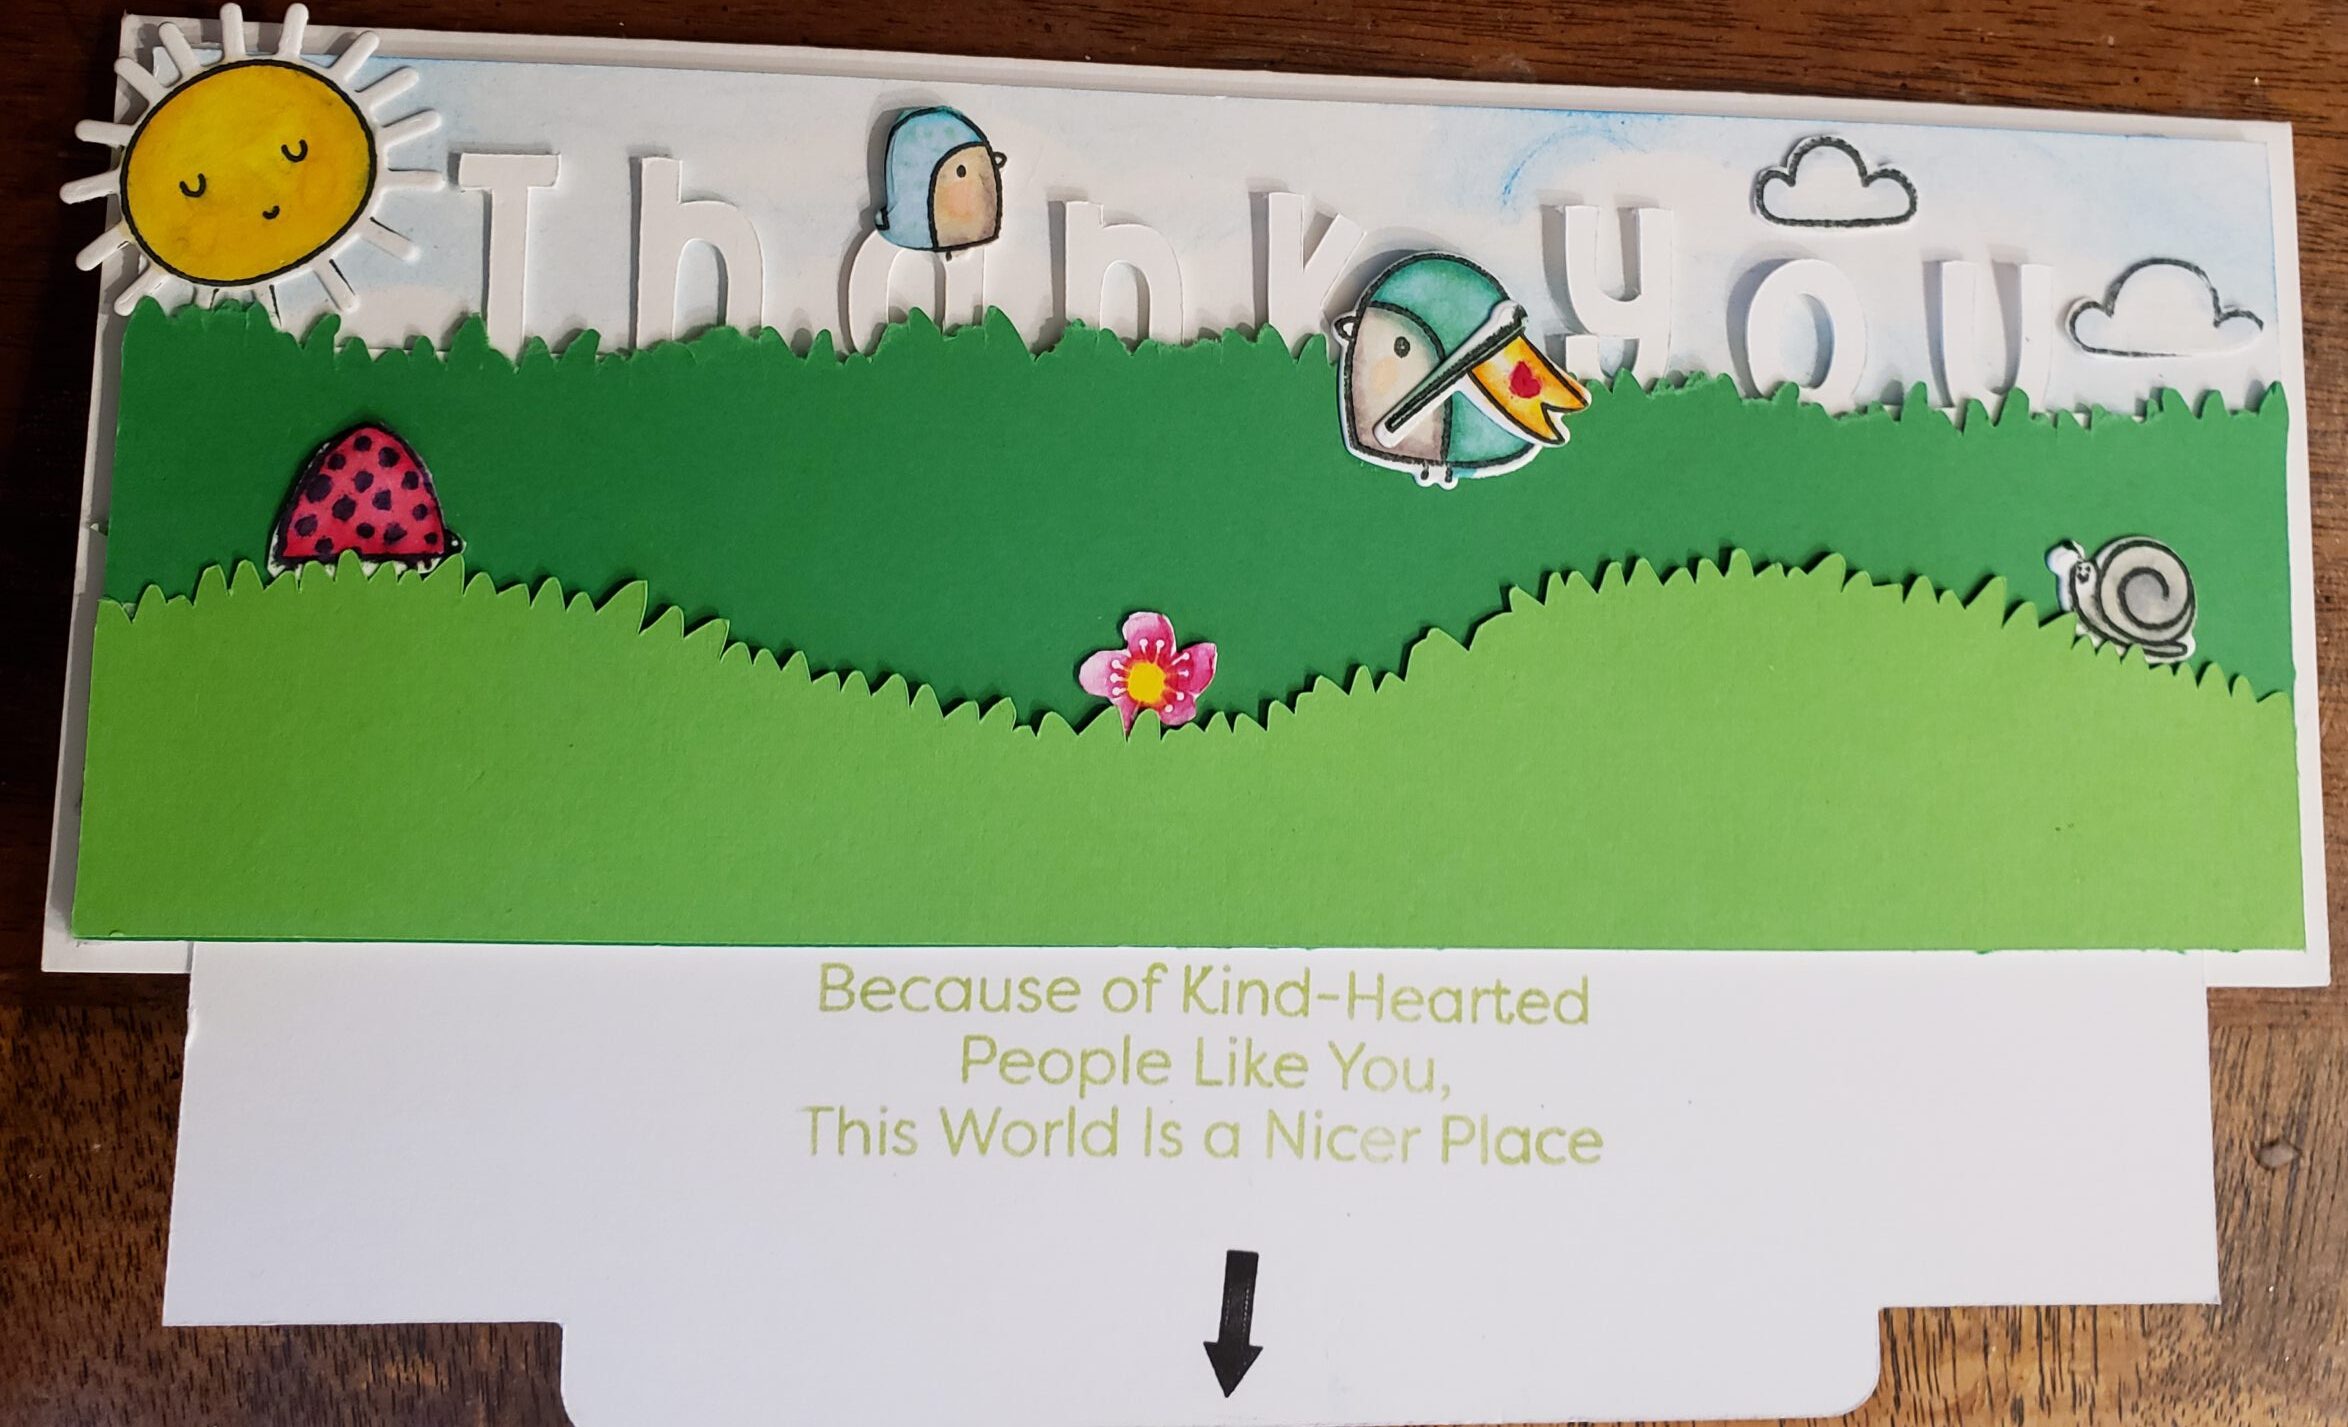
slide up text double slider card
Tip 3
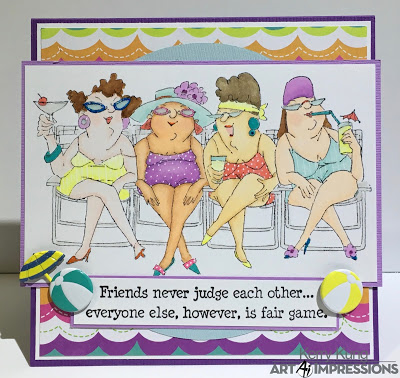
I initially failed my own Tip 2 for a few reasons, first I did not think the price of the stamp was worth it, remember, I choose the dollar store for my supply! I headed out to Michaels looking for a substitute to replicate the friendship scene of Art Impressions stamp. While there were many cute stamps, there were none that gave me the same feeling of creativity. Over the next few years, I purchased a few small stamps from Michaels, some were wood mounted, and some clear vinyl clings type. They all sat in my craft bin and here is why: I realized that once you stamp the image, you have to color it in or stamp the image with different colors. The image above is stamped then colored in. I suck at coloring! I tried to ink various parts of a stamp in different colors and stamp it but the ink dried out before I could stamp the image or I could not position the stamp accurately. I tried the mounting blocks for the vinyl clear stamps (totally gave up on the woodblock mounted stamps) NOT working for me.
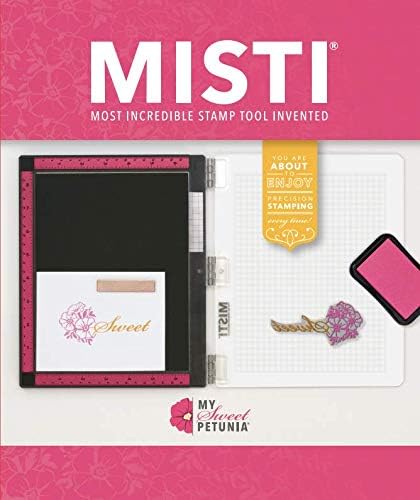
Now, when I saw someone using a stamping tool I just knew this what I needed to get started. The greatest block in my stamping journey was about to be solved!
The misty pictured below is famous and used by many crafters/stampers, and there are many others like it so find the one you like, they are all pretty similar, get one with a magnet that holds your paper in place as that really helped me and yes that was Tip number 3 find a method that helps you stamp your image accurately, allows for you to reink if needed and get a nice clean stamped image!
Worth mentioning is that I also tried to print colored images and black and white images to color and use. I did not find most of these images helpful in my craft making, but I did have success with these two tiny birds, I think it was because they are so tiny, it was difficult to mess it up.
I attempt at making a card with stamped images
Tip 4
You purchased the stamp that got your creative juices stirring, you stamped your image and now you are ready to color it all in. Keep in mind that if you mess up, all you have to do is restamp and start coloring again. It is a bit frustrating trying to teach yourself, we are blessed with tutorials on Youtube and I found that all these amazing companies that sell stamps have great tutorials and ideas, so copy the techniques, and soon, you will feel confident, have your own style, and even if you keep using the techniques exactly as shown, the final product will always be unique to you. My stamping adventure all came together with I saw an interactive stamp from My Favorite Things Stamps. It was of a little girl swinging. (She is SOOOO cute!) The interactive portion caught my attention and the fact that the stamp had a matching die to cut it out and make it swing!

Yup, after a LONG period of not stamping and NOT creating anything with a stamp, my interest was piqued. Research research research. Back to old habits of trying to replicate this card with other images and creating the swing mechanism myself. FAILED! OK not quite a fail, I got a card with a swing that did swing but NOT cute! I scrapped it. I subscribed to the My Favorite Things website and soon started to get product information in my inbox. I did finally purchase this cute girl swinging, made my card, and continue to look at tutorials using a stamped image. So, use the resources and ideas online to get you started. It seems that watching people online crafting is something of a cult following, and I did watch lots of people coloring in cards using alcohol ink markers, watercolor, pencil colors, and the more I watched, the more I got mesmerized by it all. I was in a trance, just in the zone of taking it all in, enjoying seeing their finished product, and in the back of my mind, I thought I could never produce such cute stuff. I also did not know just which alcohol pens to invest in, they can be quite pricy. So here is my tip, grab what you have on hand or get used to stuff and start coloring. the techniques for coloring are the same no matter what medium you use.
What I May Not Have Mention
I admit that it took me years to produce any type of finished product. I did not think it was worth buying stamps from companies like My Favorite Things and Art Impressions. Now I know that these stamps are well worth investing your money in: the quality of the stamp gives great stamped images, the actual images are so beautifully designed you really cannot find substitutes and the sentiments are wonderful.
The Ink pads from reputable companies like Ranger Ink, Stamping Up, My Favorite Things Stamps, Tim Holtz are worth purchasing. I did not say much about inks in this blog post but I did use a no-name brand ink on one of my lovely stamps and the stamping quality suffered! I know that this is going to be part of my crafting life and I am looking forward to stamping and learning from all these amazing people and companies.
Some Of My Favorite Tutorials
Here are links to some of my favorite tutorials to color a stamped image
Digital Stamps
Want to try printing an image to use as a stamp first?
While many line images can be printed and used as a stamp, below is a link to where you can download free digital stamps
Make Your Own Stamp
Yep! you can make your own stamp. I have a Silhouette Mint which I love BUT I cannot use embossing liquid with it, or I have not yet figured out how to do this.
You can also make your own stamps by carving certain materials and if you have a Cricut, you can also did this.
You can also use any base material and hand carve a stamp. I did a google search and tons of ideas came up.
Have fun and thanks for reading!