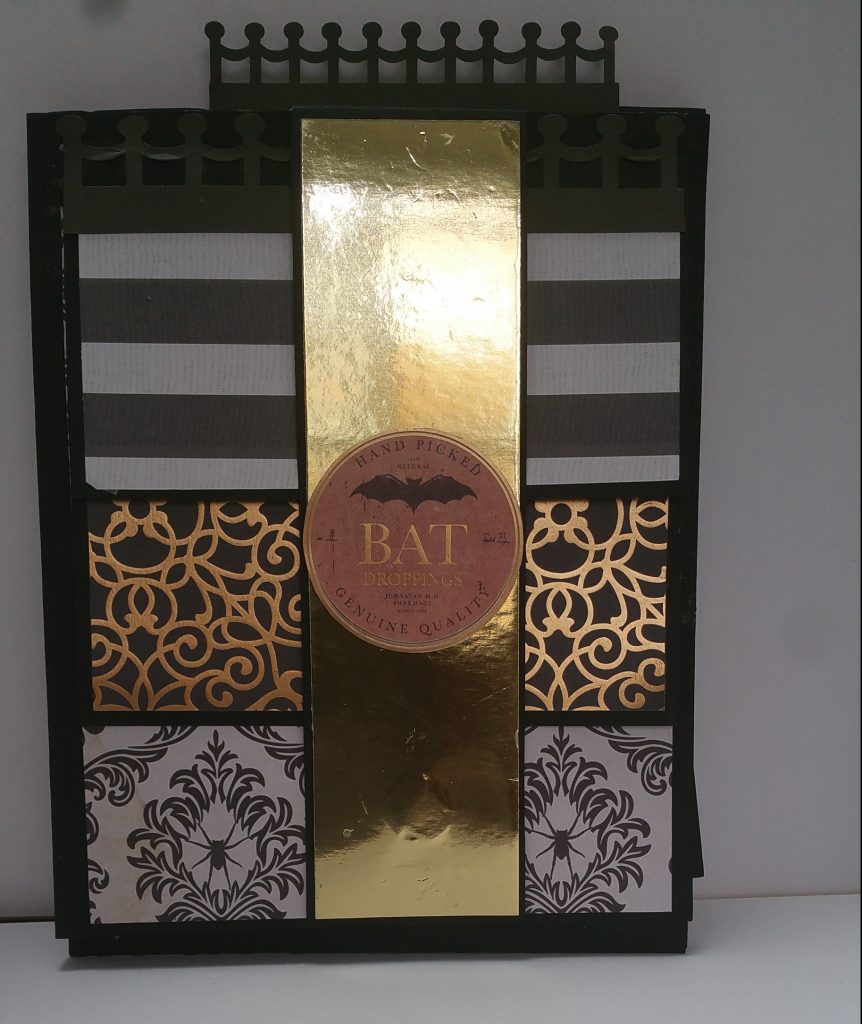
Since my last post, I have been busy with real life :job and family but finally got to put this post for page 2.
Well, here I am and page two is ready. In the first page I used zombie hands, gates, tombstone tags and a skeleton. This page is all about haunted houses.
To review a few details
My base page is the double page that looks like a large sealed envelope with the long ends cut out: very standard with Brag bookmakers.
I am using 6.5 W x 8.5 H for each of the 6 pages.
Front
The front of my brag book page 2 has a waterfall page with a belly band. I will call this side one of page two as there are a few pages that flip open on this side.
waterfall page belly band is up
Under the last Waterfall pages is an area to hold journal tags and a large photo mat.
Side 1 of page two continues
If you close up the the waterfall page back to the beginning, with the belly band keeping everything shut, this entire page then flips opens to a double spread: there is a pocket insert with slits for tags on the right (two shown here but up to 4 can fit.) and a flat page with a narrow pocket on the left for photos. The flourish is from the Silhouette design store
The waterfall pages are behind on the left
Back OR Side 2 of page two
The side 2 of page two has 2 envelopes. Tag insert not shown here.
These then flip open to reveal a flat page for photos. The envelopes on this side has some of the tags that came with the paper but I notice its a little big, so will trim them down later
Sides
One open side of the page is attached to the binding, (on the right not seen here). The other side of the page will have a tag insert. This tombstone tag is not the correct tag but shown as an example of how the tag will be inserted
I like this second page and have Page 3 all ready to photograph for tomorrow.
Below are the screenshot of what the files look like in Silhouette Studio, a free software that you can use with or without the silhouette machine to make pages like this . I filled the image with the same pattern as my paper.
Screen shots Page 2 side 1
waterfall pages
Waterfall pages closed and the whole page open again to thispages expanded
Screen shots Page 2 side 2
If you would like the file for this second page, Subscribe below then email me what you would like.
I have to say that this step took a long time for me to begin as I was
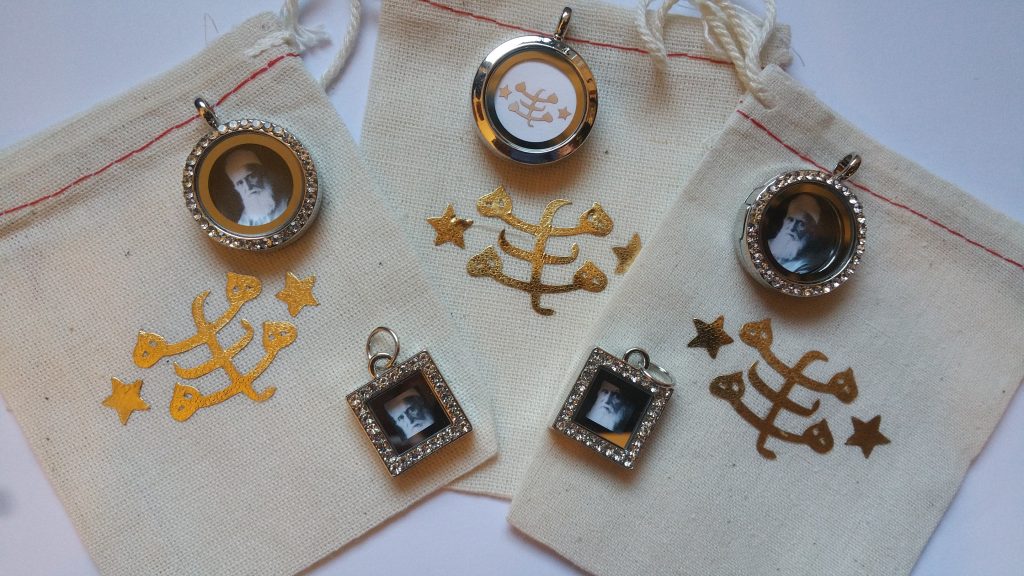
 feeling out of my comfort zone and just not certain if this cover will be what I wanted.
Take it from me, now that I have done the cover…no need to freak out! Follow my instructions or look up video instructions…lots of information out there and have fun, make mistakes and move on!
Step One: Make your cover
I first needed to buy medium density chipboard but I was not willing to make a trip to Micheals or wait for Ebay or Amazon delivery…LOL…sooooo I and went looking to see what I could substitute. I found stacks of very thick photo mats in my garage and cut it down to size (9 in x 9in ) with my Exacto knife. So far so good.
Tip
As I make each piece of this brag book, I am creating the digital templates AKA the Digital SVG cutting files and PDF files so that the next book will be a breeze. If you decide to make your own book from scratch, consider doing the same.
Step two: A Decision to make.
Now the decision was to lay the pieces out on one sheet of paper and wrap front, back, and spine together or wrap separately.
1, Here is an example of a cover wrapped in one sheet of paper (video at about 32 minutes in) This video is also a great resource for making a brag book.
2, Here is a video with an example of the pieces wrapped separately and joined. This is from one of my favourite brag book creators Jen of Eve
I am going to use method # 2 for a few reasons, but the main reason is that I want to make bigger albums and to find paper large enough to do a one-sheet wrap is not easy.
Cover, Spine and Binding cut
Here are my front and back covers and spine cut from matting material I am using 9 x 9 as my size. I did not use my Silhouette to cut these but you can use your machine with a deep cutting blade. If you want to skip all the measuring and just want the SVG files to cut , then subscribe and the message me: I want your Brag Book cover package and I will send the files for the cover and spine and the files for the wrapping.
“chipboard ” pieces for the book cover and spine
Here are the front & back covers, and the spine wrapping cut out. I used 12 x 12 sheets to fit the 9 x 9 cover size with a 1/2 inch tab allowance for glueing. Dollar store Bristol board works well and all you will need is one sheet
Here are the front and back of the cover with the cardstock wrapping glued on. The spine cardstock is not attached to top and bottom of the spine yet and will be attached next.
Everything is covered up and this is the finished cover and spine
If you want the digital cut files for the cover, spine and binding , subscribe to my blog and send me a request.
Next post: the page binding: found out some interesting information!
Please subscribe for my blog, i would also love to know what you want to read about.
I am always on the look out for an easy craft that kids can help with. I like crafts that kids, can do that are not just paper plates, tissue paper etc. Those types of crafts are nice but sometimes I want an extra wow factor. This year I was looking for a Naw-Rúz gift.
For those who have never heard of Naw-Rúz it is the Baha’i New Year, which falls in March, sometimes it is on the 20th and sometimes on the 21st. Many other people around the world celebrate this time of year also.
This year Naw-Rúz on the 21st March and it marks the Vernal Equinox in the Earth’s Northern Hemisphere and the Autumnal Equinox in the South—that day when the sun’s light strikes the Equator directly and illuminates every continent equally.
Shopping for Naw-Rúz is like shopping for any major holiday where gifts are exchanges. The shopping experience can be frustrating, fun, overwhelming, happy, sad… you name the emotion we most likely experience it. Like everyone during a festive season, we went looking for the perfect gifts. Although we did get great gifts, it felt like they did not reflect the holiday in a special way. For those of you with young kids, well I think online shopping looks very appealing right now and you are thinking there is no time to make anything personalized. Well read on and I promise this is a 10 minute easy mini craft for you and the kids.
My 6 easy steps to making a personalized pendant
So, here is what I decided to do in a few really easy DIY steps that even if you have newborn triples it will be finished in under 10 minutes, I promise (not including the purchase of course!) .
It took me less than 10 minutes to do 6!
Step One
I went to Michaels and found theses very cute pendants: 2 in a pack for about $14. The pendants are in the jewlery making section and I am sure any craft store will have something that you can use that is similar. Michaels always has a coupon so make sure and use it. This time it was 40% off
Step 2
Next I printed a photo of ‘Abdu’l-Bahá the Son of the Baha’i Faiths founder Baha’u’llah) and printed it on white regular cardstock. You can of course use any photo or symbol.
I choose the photo and not just crystals or little heart charms because I remembered my two friends discussing the best gift they received as children. I am sure the gifts my friends discussed was not a photo in a costume jewelry pendant like mine, but they loved this gift from their mum! I think it was because it was so small and wearable and different from the other gifts they had received.
The photos of Abdu’l-Baha needed to be small enough to fit the frames.
If you buy the same frames, the size for the square frame is 2/8 inch and the round is 3/8th diameter.
Here is alink to my file for you to download and print. Or you can find a photo you like better by searching Google make sure that the usage rights allow for reuse.
Step 3
I cut the photos by hand. There is no need to be exact as they are so small little imperfections really do not show.
TIP: for cutting anything round, move the paper not the scissors, it is much easier that way.
Step 5
The next step is to remove the little mockup photo that came with the frame. I used this weeding hook I had with a piece of sticky tape, this grabs the insert really easily and pulls it out. You can also use a straight pin to push the photo out from the bottom of the frame
Step 6
The final step, put the images into the pendant. The square image inserts on the top. The round pendant opens on the side with a magnetic closure. The round pendant is also glass on two sides so the back of the photo shows. I decided to put a Baha’i symbol so the pendant can be worn either way. I have included it in my file for download. Cut the photo of `Abdu’l-Bahá and The Greatest Name and stick back to back then insert into the round frame
Round Pendant without a photo
Round Pendant with photo
close up of Round Pendant with photo
square pendant with photo
You are done!
You can stop here. What do you think? pretty easy DIY project right? I think it turned out beautiful.
I went and did a few extra steps.
Optional
I have some blank little bags that I will put the pendant in and so I will decorate them.
You can find little bags in the dollar store if you want to venture out or use my little rectangle box template: It should take about 5 to 10 minutes to print, cut and glue it together.
I have a few heart shaped boxes in red that I painted white with dollar store craft paint. I am still deciding if I like this container for this special gift.
If you want a box to put your gift it, here is a link to my square template box with a lid. Decorate it as you like.