Categories
10 minute craft Creating files Free Paper Silhouette Tutorial Template

7 Steps for Custom Pocket

For my brag books I use templated pockets, tags, pages etc. and customized them for each brag book that I make. The customization can be from welding images to adding embellishments or even just decorative paper.

In this post I will show you step by step how to customize a flap or pocket that involves cropping and welding to give a lovely cut out effect. This technique can be used with any item and design element.

Step 1 Item to customize

Once you know what you want to customize, make sure you have resized it to fit your project. There are so many uses for this technique that it is difficult to list them all. I am going to use a narrow pocket and a flower image that can be inserted in a brag book. Your project could be part of a greeting card, scrapbook layout, wall hanging, sign, stencil and more.

Step 2 Design or font to be used

I use designs I create myself as well as designs and fonts from places like Silhouette Design Store, Creative Fabrica (my affiliate link), designs from Google search, Pixabay and more. As mentioned, I am using a flower image.

Some important thing to consider are:

  • Make sure that your font/design is not too delicate as it may rip easily
  • If you font or design is thin, use an offset of about .005 to make it easier to cut.
  • If the design or font is too intricate or small as it may rip while cutting, try to use simpler larger designs
  • Look for smooth curves vs sharp angles

Step 3 Arrange your file

Arrange your items in Silhouette Studio so that you are happy with the finished size of the project. If there are multiple layers like score line, ungroup all layers first.

Step 4 Cut out a space

Next you need to cut into the narrow pocket. To do so you need a size cut out of the pocket that allows your design of the flower to fit in to the space but have a little over lap. I am using a circle to cut out the space I need and it is a tiny bit smaller than the flower design.

Step 5 Subtract

Next, position the circle so that it is in the middle of the pocket. I am using only half of the circle to cut into my pocket as seen in the photo below. Once you are happy with the look of the cutout section, use the subtract feature.

Step 6 Weld

Position the image (flower) in the space created and once you are happy with the result, choose WELD feature.

Step 7 Finish up

Notice that the image of the pocket has no score lines (dashed line) that is because once you use the weld feature, it brings the result to the front. To correct this, send the image (pocket) to the back so that score lines are visible

Categories
Creating files Free Mini Album and Brag Books Paper silhouette design store Silhouette Tutorial Template

Weld Images in Silhouette Studio

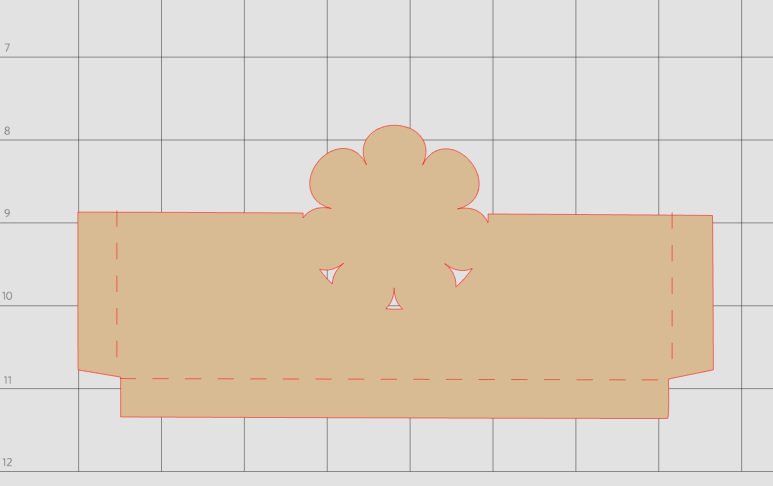
Before I continue to page 4 of the Brag book, I want to show the simple steps to weld an images with the pocket files I made.

If you would like any of the files I create, then subscribe below and send me a message with the file you would like!

I had a few request about the pockets files I used in the Brag Book and some of you wanted to know where I got the files. I made the pocket files myself and modified them using images that I purchased from Silhouette Design store or got from other sources like Google and Creative Fabrica

Weld in 6 Easy Steps

  • First of all, open the pocket file in studio and choose the pocket you would like to modify.
  • Next open the image you want to attach and resize it to fit your pocket: I am using the kitty.
  • Ungroup any score line
  • Arrange your images: note if you move your image around, make sure you keep the score line together with image
  • Choose weld (its on top tool bar and loos like a rectangle with a circle attached) and image will weld together and become one image.
  • Reattach score line as necessary. (the score line may have moved to the back so send the pocket to the back and score lines will now be on top)

AND….. That is all there is to weld any image together. It is the same for any of the pockets and tags in my brag book : 6 very easy steps.

See how weld is used in past pages

Go here to access my Brag Book Pg 1

Go here to access my Brag Book Pg 2

Go here to access my Brag Book Pg 3

Hope you have Fun with Welding files. Please subscribe below!

Carolyn

[wpforms id=”1223″ title=”false” description=”false”]