
Sometimes a hands-on activity begins with a very simple question:
What if the students could do more than just write down an answer?
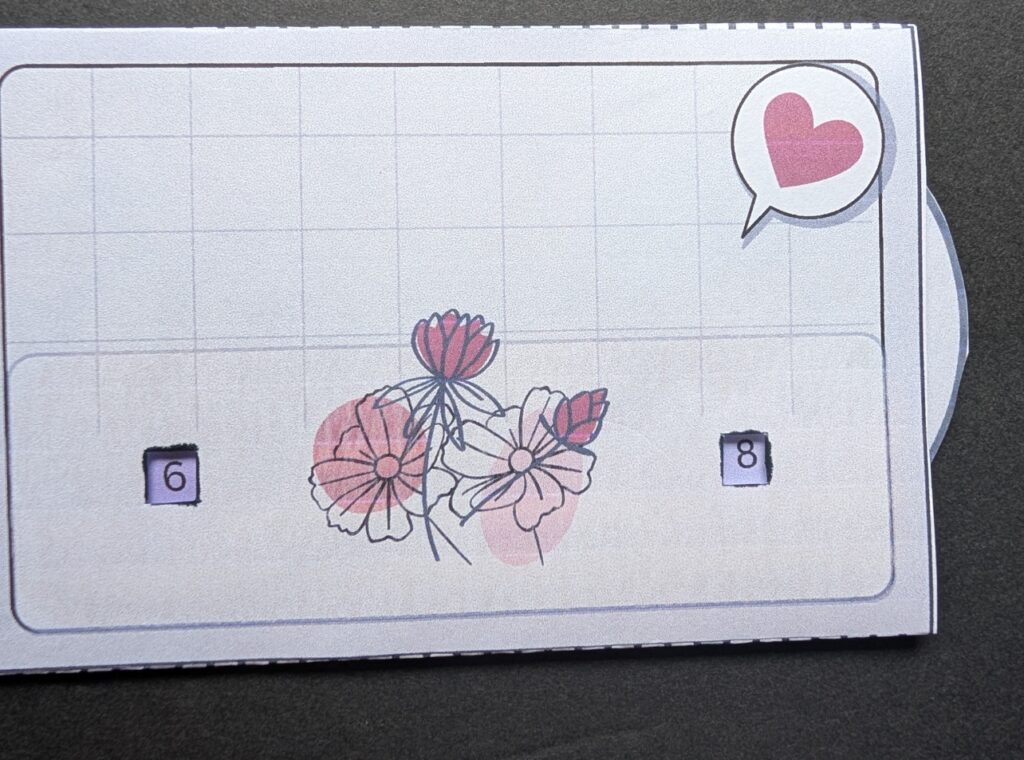
That question was the starting point for the Poll Counter I developed for my Grade 3 Zoroaster lesson.
The lesson introduced students to the idea that people in the time of Zoroaster worshipped many different elements. The original activity asked students to think about what an element might have been and write down their idea.
They might think of a mountain, a rock, or the moon.
That worked as an individual activity, but as I worked through the lesson, I started thinking about what might happen if the students could share their ideas with one another.
What if one student wrote “mountain” and then discovered that several other students had thought of the same thing?
And what if there were other ideas?
I wanted the students to ask one another, compare their answers, and record the results.
I didn’t want the activity to become just another worksheet. I wanted students to get up, consult, interact, and come up with a result together.
And that is where the idea for a Poll Counter began.
The First Idea: A Moving Number Belt
My first thought was to create a mechanism where numbers would move through a window on a paper belt.
It seemed like a simple solution.
The numbers could slide through an opening, and the student could pull the belt until the desired number appeared.
But once I started making and testing it, I quickly discovered that what looks simple on paper isn’t always simple to build.
The paper belt was too fragile for the repeated pulling motion.
It also didn’t stay straight as it moved through the guide.
More importantly, I realized that the construction itself was becoming too complicated. I was designing something that might work for me, but I wasn’t convinced it would be easy for someone else to cut, assemble, and use.
So I went back to the drawing board.
Trying a Wheel
My next idea was a rotating wheel.
Instead of pulling a strip of paper through a guide, the numbers would rotate behind the opening.
This solved some of the problems with the moving belt—but introduced several new ones.
The numbers had to be positioned correctly around the wheel.
There were also issues with how the numbers would appear depending on the direction and placement of the wheel. I had to think about spacing, the size of the wheel, and exactly where each number needed to sit so that it would line up properly with the viewing window.
It became one of those projects where changing one thing seemed to affect three other things.
The wheel needed to be the right size.
The window needed to be the right size.
And the numbers needed to be in exactly the right position.
Close wasn’t good enough.
If the number was slightly misplaced, it might not appear properly through the window.
Finding the Design That Worked
Eventually, I moved to a circle divided into 10 sections, with the numbers 0–9 arranged around it.
This became the basis of the final dial mechanism.
But even after I had the basic mechanism working, the project wasn’t finished.
I estimate I made around ten complete reprints during the development process.
By about the eighth reprint, I had the mechanism itself working the way I wanted.
But now I had another question:
Could I make the entire project easy for someone else to assemble?
That meant more testing.
More printing.
More cutting.
More assembling.
And more changes.
When “Easy to Make” Became Part of the Design
One of the things I discovered during the process was that designing an interactive paper project isn’t only about making the mechanism work.
It also means thinking about the person who has to cut it, fold it, attach the pieces, and eventually hand it to a child.
For example, I originally designed the windows with round openings.
They looked nice.
But then I thought about someone actually cutting those circles out.
A clean round cut is more difficult than a straight-edged opening, particularly when the resource is being prepared at home or in a classroom.
I experimented with a rounded rectangle.
That was better.
But eventually I chose a simple rectangle because it was easier to cut cleanly.
It was a small design change, but it made the project more practical.
And that became a recurring theme throughout the development.
If something could be made simpler without losing its function, I wanted to simplify it.
The Details That Only Appear Through Testing
The final rounds of testing involved much more than checking whether the dial turned.
I moved decorative elements, including the flowers, so they worked better with the construction.
I adjusted the window opening.
I made the flap longer so that the brads would be hidden at the back.
I also considered how a child would actually hold the finished Poll Counter and added a safer area for them to hold.
These aren’t necessarily the things someone notices when looking at the finished project.
But they are the kinds of details that matter when you’re designing something that someone else has to assemble and use.
The goal wasn’t simply:
“Can I make this work?”
It became:
“Can I make this work consistently, and can I make the process simple enough for someone else to follow?”
From One Lesson to a Reusable Tool
Something else happened while I was developing the Poll Counter.
I realized that there was no reason for it to remain tied to the original Zoroaster activity.
The mechanism could be used for many different questions.
A teacher might ask:
How many students have siblings?
Or:
How many students have the letter “A” in their name?
A group might use it to record the result of a discussion.
A leader could use it as an ice breaker.
A homeschool parent could create a simple counting activity.
A summer camp leader or children’s organization could use it as part of a group activity.
The Poll Counter doesn’t provide a prescribed question.
Instead, the teacher or group leader decides what they want the group to find out.
That flexibility was intentional.
One person might give every student a Poll Counter.
Another teacher might have students work in small groups and give each group one.
Or a teacher could make three Poll Counters and divide the class into three groups.
There isn’t one required way to use it.
The tool simply provides a hands-on way to record a number and make the result visible.
The Next Test: Letting Someone Else Use It
So far, all of the designing, printing, cutting, and testing has been done by me.
That means there is still one important test left: letting someone else make and use the Poll Counter.
On August 20, I plan to take two Poll Counter templates and their instructions to a community event. The children will assemble their own Poll Counters rather than having me prepare the finished projects for them.
I’ll be watching to see what happens.
Can they follow the instructions?
Are the construction steps clear?
Is anything confusing?
Can they operate the dials easily?
Once the Poll Counters are assembled, each child will create a question for their own poll. I’ll observe how they use the counters to ask their questions and record the results.
I’ll also photograph parts of the process, including the assembly and the completed Poll Counters showing their final numbers.
That will give me something I can’t get from my own testing:
a chance to see someone else actually use the resource.
What I Learned From Making a “Simple” Poll Counter
The finished Poll Counter looks fairly simple.
That may be one of the biggest lessons from making it.
A simple-looking paper mechanism can involve quite a lot of testing behind the scenes.
The moving belt didn’t work.
The first wheel design created new problems.
The number placement required careful adjustment.
The window changed from round, to rounded rectangle, to simple rectangle.
And even after the mechanism worked, I still had to rethink graphics, construction, hidden fasteners, and how a child would hold the finished piece.
About ten reprints later, I had something I was happy with.
But the real test will be seeing what happens when someone else makes it and uses it.
That is the part of the design process I’m looking forward to most.
Why I Made It
At its heart, the Poll Counter came from wanting students to do something together.
Think of an idea.
Ask someone else.
Discover that they may have thought the same thing—or something completely different.
Talk about it.
And record what the group found.
The finished tool is small, but the reason behind it is bigger than simply counting numbers.
It is about giving a group a reason to interact with one another and see their collective response.
And that is why I decided the Poll Counter deserved to become a resource of its own.
Want to try the Poll Counter?
If you’d like to use the Poll Counter with your own group, you can find the resource here:
The Poll Counter grew out of one lesson, but I designed it to be flexible enough to use with many different questions and group activities.