Scared yet?
I have to say that this step took a long time for me to begin as I was feeling out of my comfort zone and just not certain if this cover will be what I wanted.
Take it from me, now that I have done the cover…no need to freak out! Follow my instructions or look up video instructions…lots of information out there and have fun, make mistakes and move on!
Step One: Make your cover
I first needed to buy medium density chipboard but I was not willing to make a trip to Micheals or wait for Ebay or Amazon delivery…LOL…sooooo I and went looking to see what I could substitute. I found stacks of very thick photo mats in my garage and cut it down to size (9 in x 9in ) with my Exacto knife. So far so good.
Tip
As I make each piece of this brag book, I am creating the digital templates AKA the Digital SVG cutting files and PDF files so that the next book will be a breeze. If you decide to make your own book from scratch, consider doing the same.
Step two: A Decision to make.
Now the decision was to lay the pieces out on one sheet of paper and wrap front, back, and spine together or wrap separately.
1, Here is an example of a cover wrapped in one sheet of paper (video at about 32 minutes in) This video is also a great resource for making a brag book.
2, Here is a video with an example of the pieces wrapped separately and joined. This is from one of my favourite brag book creators Jen of Eve
I am going to use method # 2 for a few reasons, but the main reason is that I want to make bigger albums and to find paper large enough to do a one-sheet wrap is not easy.
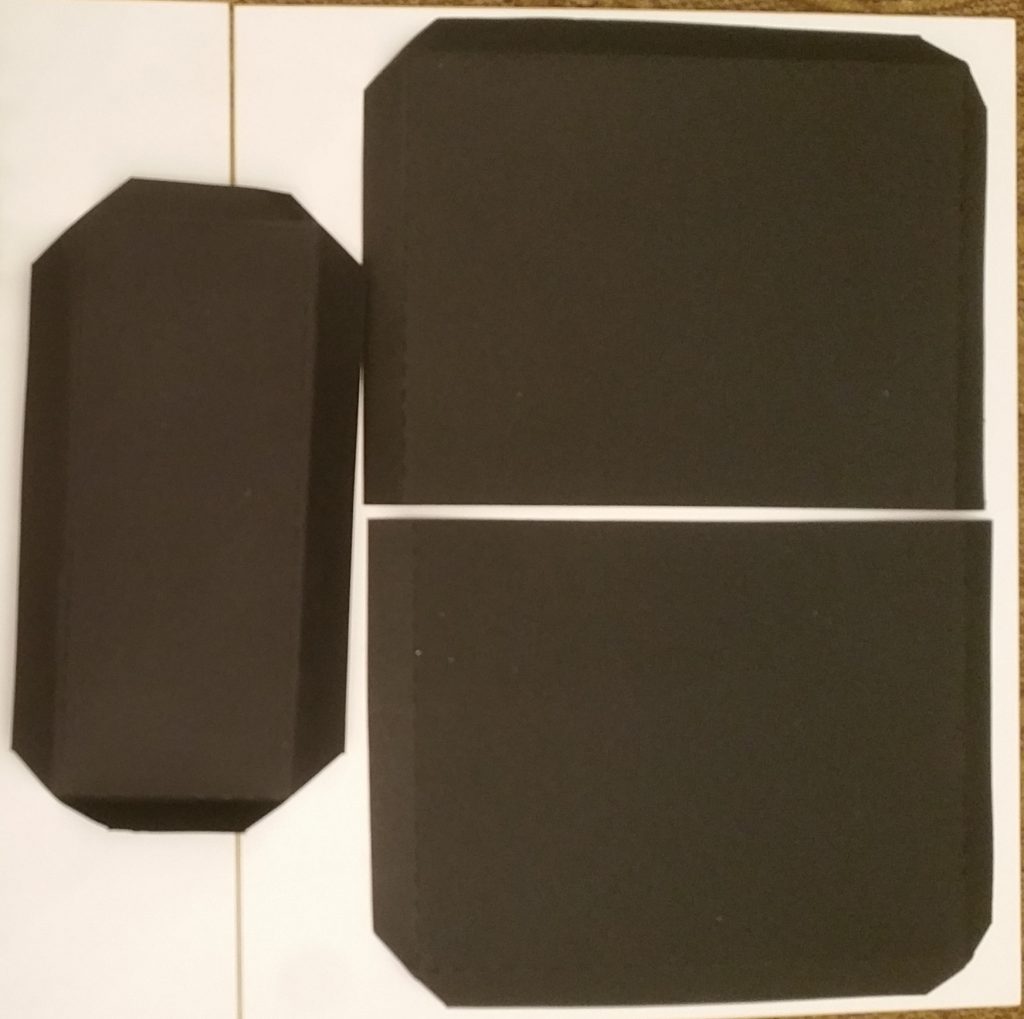
Cover, Spine and Binding cut
Here are my front and back covers and spine cut from matting material I am using 9 x 9 as my size. I did not use my Silhouette to cut these but you can use your machine with a deep cutting blade. If you want to skip all the measuring and just want the SVG files to cut , then subscribe and the message me: I want your Brag Book cover package and I will send the files for the cover and spine and the files for the wrapping.

Here are the front & back covers, and the spine wrapping cut out. I used 12 x 12 sheets to fit the 9 x 9 cover size with a 1/2 inch tab allowance for glueing. Dollar store Bristol board works well and all you will need is one sheet
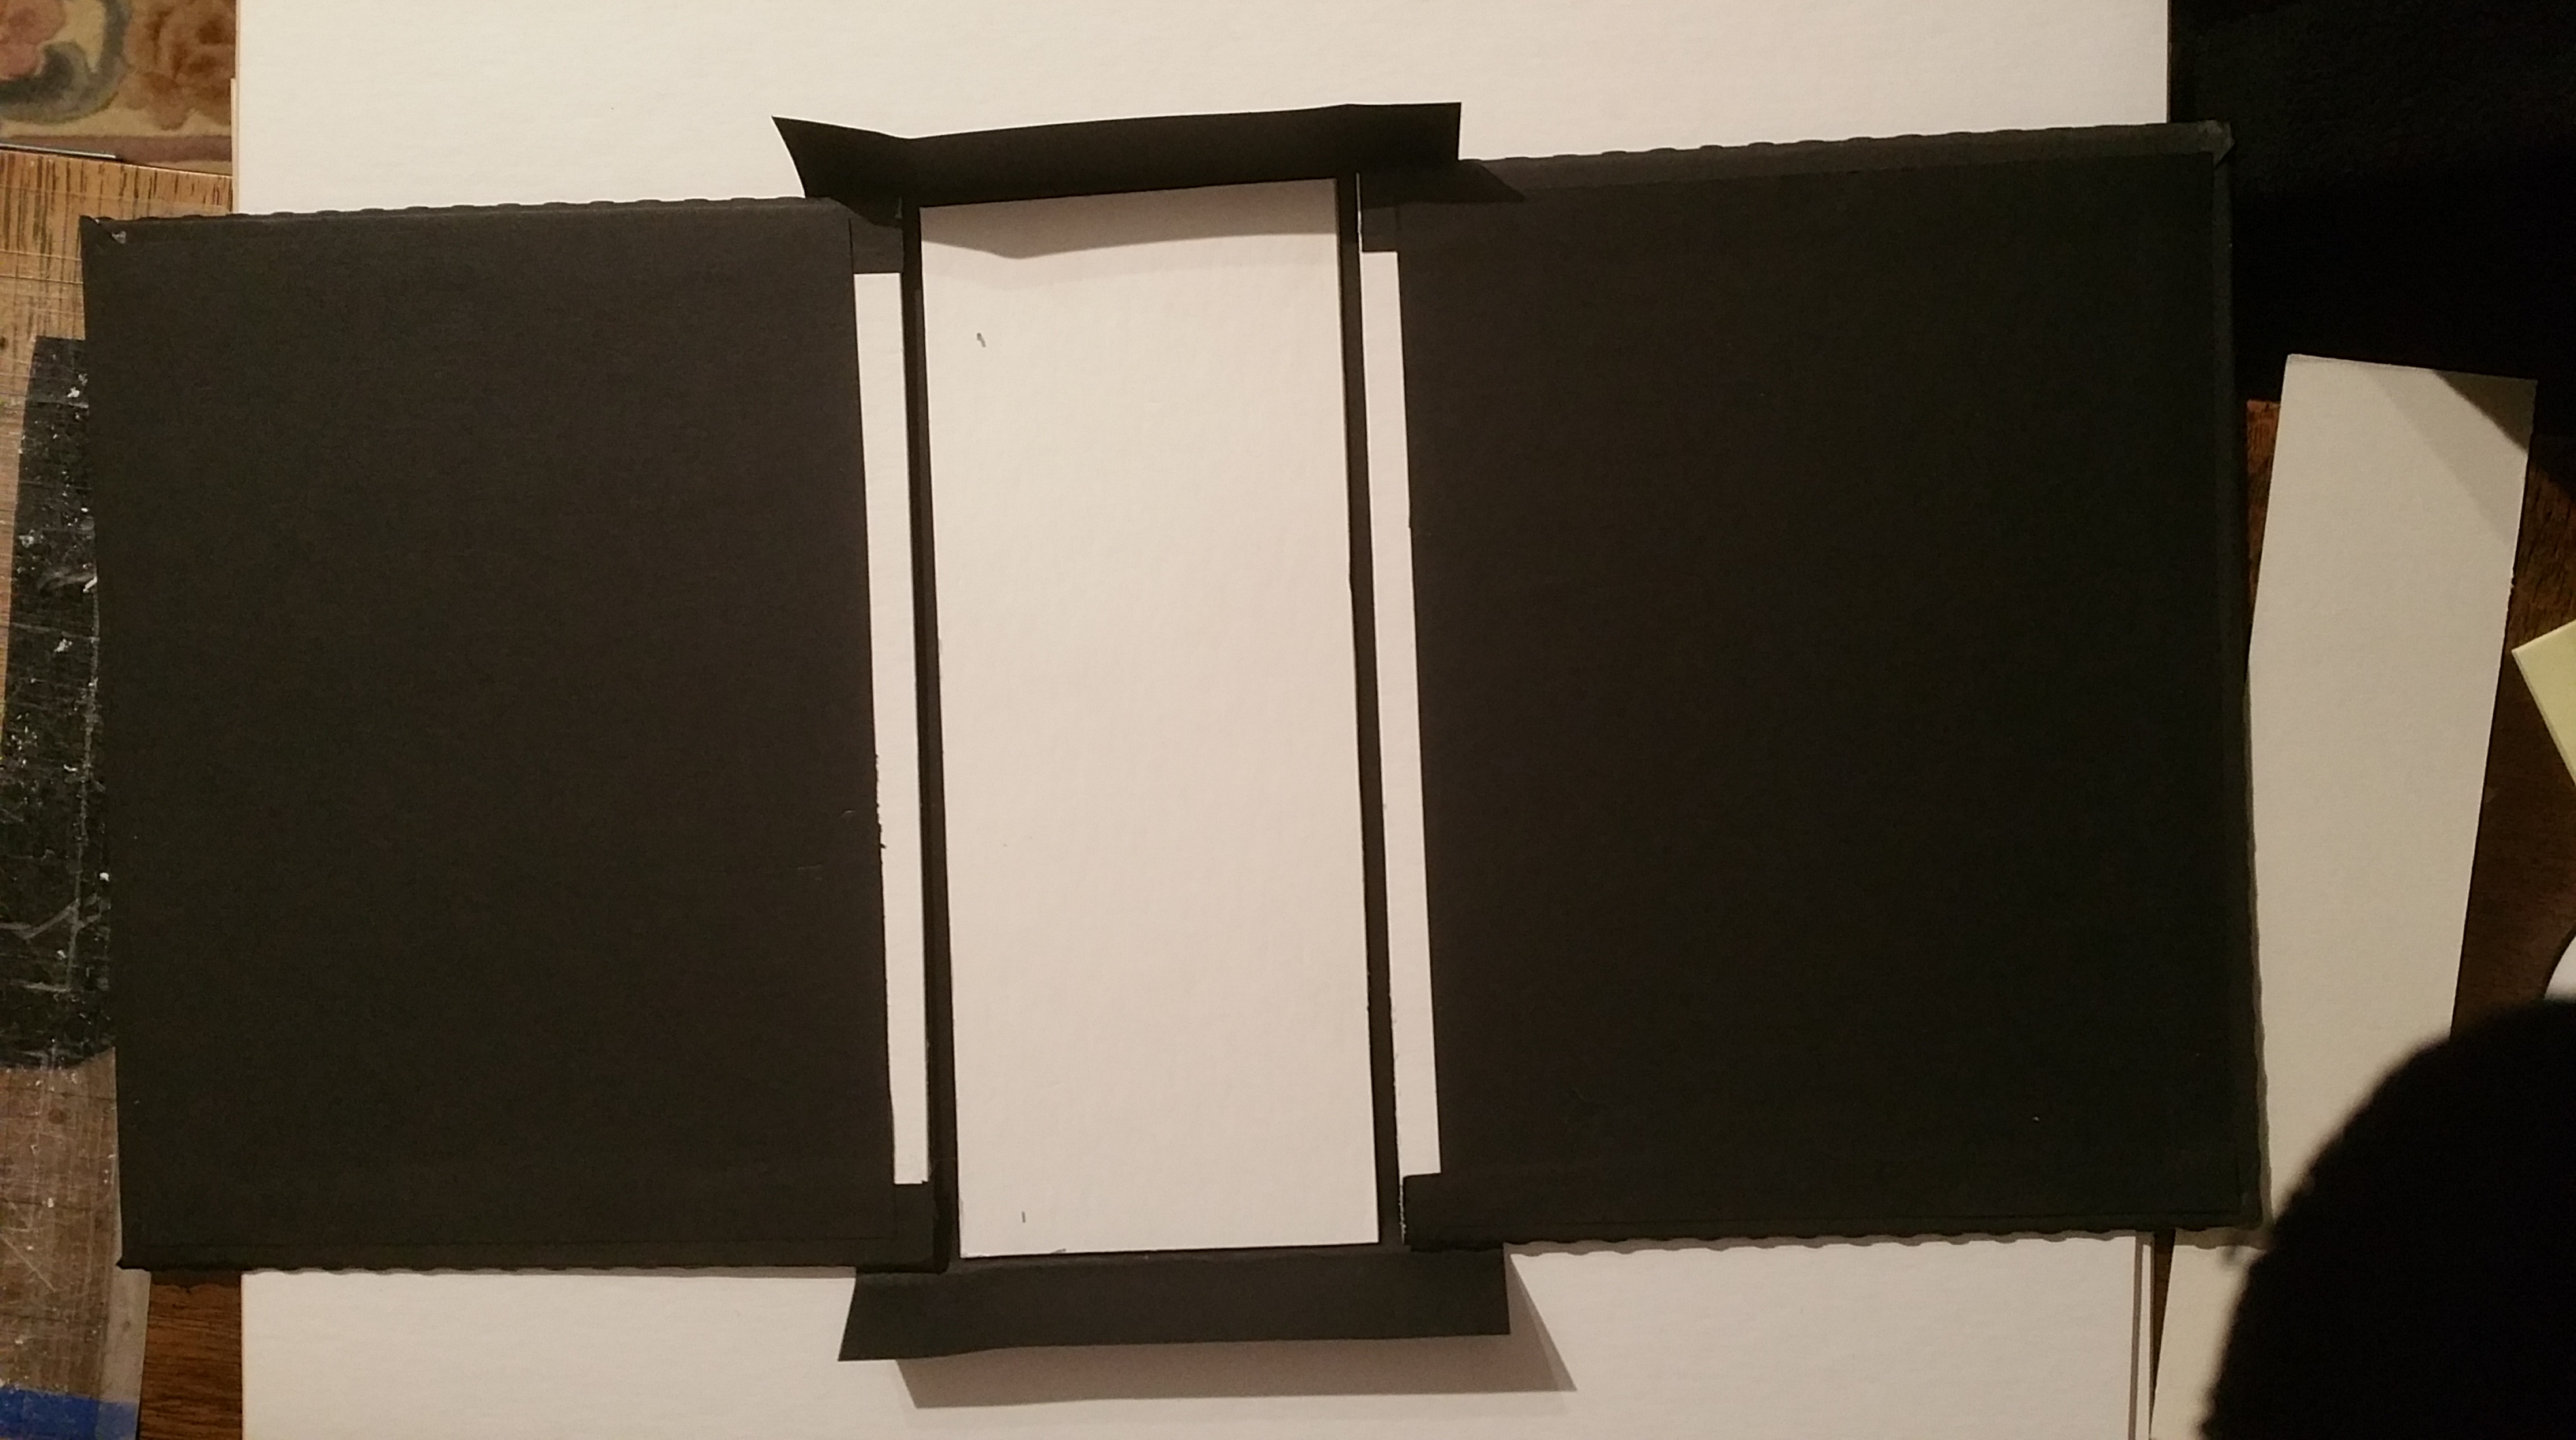
Here are the front and back of the cover with the cardstock wrapping glued on. The spine cardstock is not attached to top and bottom of the spine yet and will be attached next.

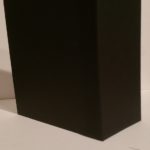
Everything is covered up and this is the finished cover and spine
If you want the digital cut files for the cover, spine and binding , subscribe to my blog and send me a request.
Next post: the page binding: found out some interesting information!
Please subscribe for my blog, i would also love to know what you want to read about.
[wpforms id=”1223″ title=”false” description=”false”]
Carolyn
Leave a Reply