
The folio for page 4 side 2 is now all glued together, In this post I will walk you through exactly how this folio opens and mention any changes I made or options for layout.
Recap of Folio
Side 2 of page four is complete: a little final gluing down to be done, but I am OK with that! If you are just getting here and want to see the other pages and templates take a look here:
Use this Folio
- The folios can be used in many ways. Side 2 of page 4 can be a stand-alone folio, and so can page 4 side 1.
- A lovely mini photo album to give as gifts.
- Add your own photos and give as a very elaborate greeting card or
- attach as to a page in a brag book: like we are doing here.
This is what it looks like all closed up. You could put a photo here on the cover if you wanted… maybe put a photo mat on top then the photo.
Pages of this Folio
- Cover for page 4 side 2. The folio is all folded up in the photo below and has a magnetic closure.
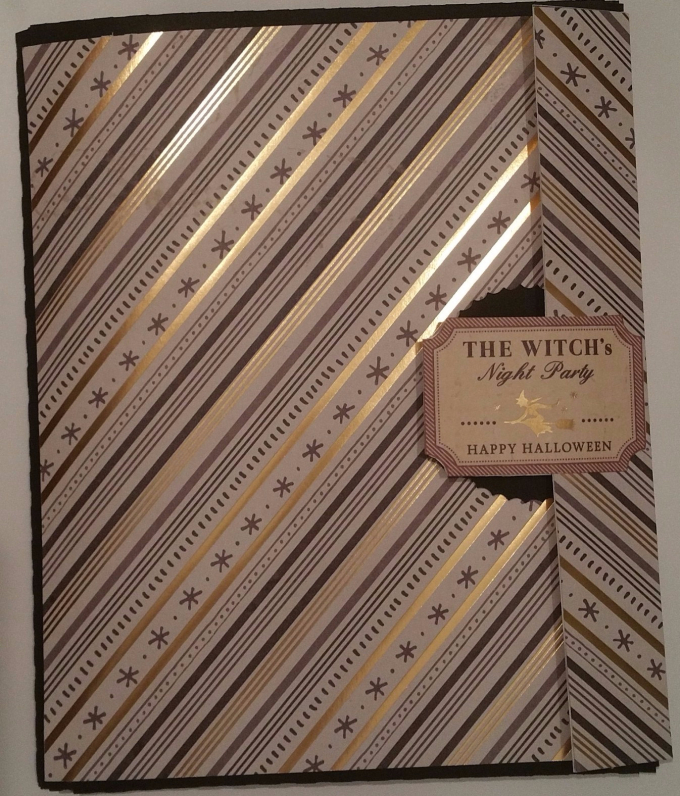
- Next, open it up . The tag “the Witch Night Party ” is a magnetic closure.
- The large piece front page can also hold a photo if needed folds
- The cover opens to the left.
Opened Folio up once
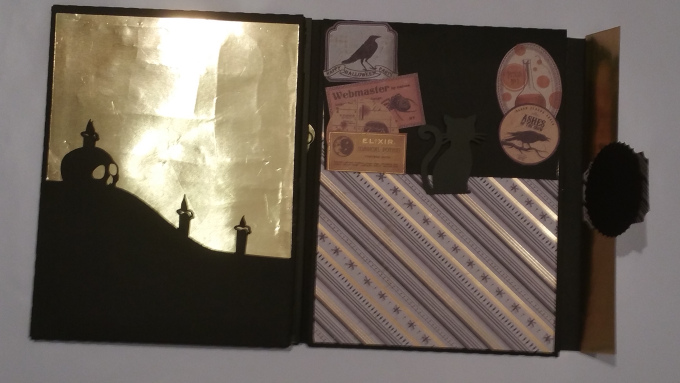
- there is a pocket on the left.I welded on the skull and candles to the pocket. If you would like to try this my post on how to weld items is here.
- On the right is a flap with a cat tab attached. The cutout pieces are from the scrapbook paper and can be used as spaces to hold notes or small photos.
Opened up twice
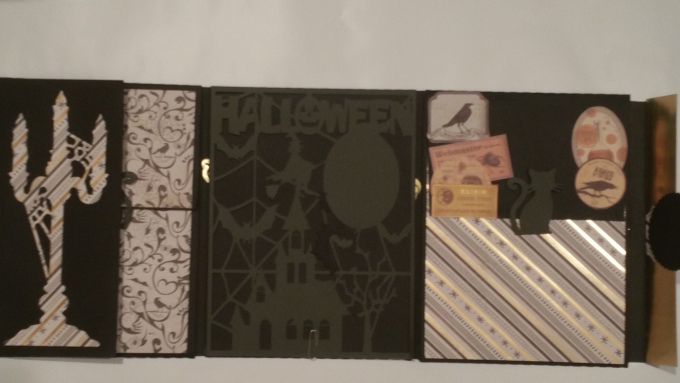
The left piece opens and there is a half page with a cutout candelabra, this page could be matted and used for photos or any of the flaps in this insert can be eliminated.
The central panel is a cutout Halloween scene, small tags can be slipped into the cut sections and the oval-shaped moon can be used for a photo… It is not glued down yet (notice the paperclip?) Both candelabra and Halloween scene are cut files from the Silhouette Design store
Let’s open The Folio for the third time
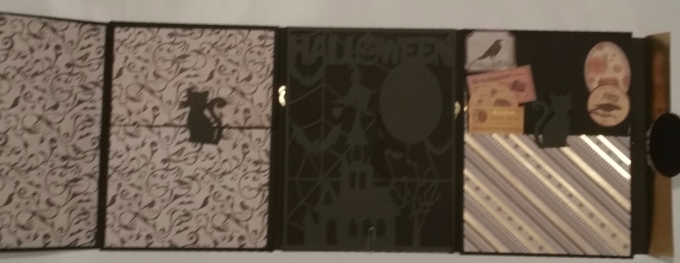
- The half page on the far left is matted and can be used for photos.
- Next to this is a page with a flap that has a cat tab attached, this pulls down .
- For the rest of the pages on the right, the view has not really changed much.
Fully opened Folio: all flaps open
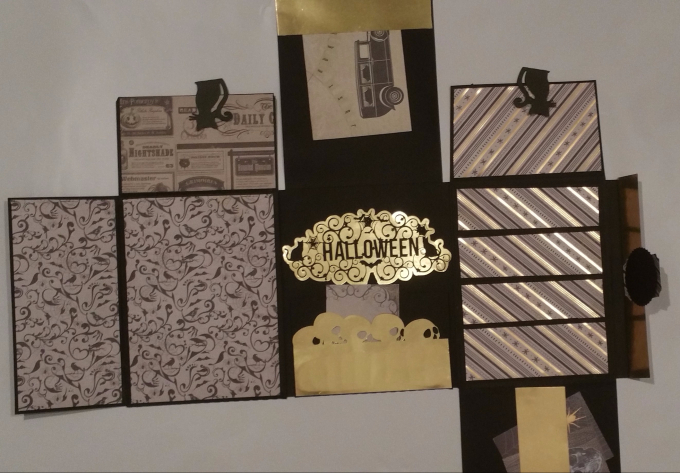
Ok, we are getting to the end of all the flaps and folds…here it is all opened up.
NOTE: it is NOT upside down, it was not 100% glued down and at the very last minute, I changed where i wanted the flaps to be on this last folio page. The template digital files are flexible that way, Changed how the flaps are attached, the number of pages, pockets…each time can be a different look and feel using the same cut files.
My layout when I cut the cardstock was arranged differently, see the post here
Things to note
- The middle page flips up and the gold “Halloween” cut out file is from Silhouette Design Store.
- The pocket with skulls (GOLD) can be a flap that folds down instead.
- The flap on the top has a narrow pocket to hold items.
- On the right, there are slots for tags that can hold photos…I need to cut the large tags for this.
- The bottom flap got cut off in the photo…it has a magnetic belly band to hold items.
Subscribe for my file
Really liked this Folio? Subscribe and send me a message: “I want Folio page 4 side 2 and its yours!”
Have fun
Carolyn
Leave a Reply